
Getting started with mold removal can feel overwhelming, especially if you are a first-time homeowner or have never tackled a moisture problem before. New Jersey’s humid summers and storm-prone seasons can turn small leaks into persistent issues. The good news is that beginners can follow a clear, practical process to reduce health risks and restore a safe living environment. This beginner-friendly guide covers essentials from safety and containment to cleaning, drying, and prevention. As you learn the basics of mold removal, you will gain the confidence to handle small projects and recognize when to call for help.
The steps below are designed for typical household scenarios such as bathroom ceiling spots, under-sink leaks, basement humidity, or minor attic condensation. Larger or recurring outbreaks may require professional assistance, but mastering these fundamentals will make you a more effective homeowner and reduce the chance of future growth.
Know Your Enemy: What Mold Needs to Grow
Mold requires moisture, a food source, and time. In homes, moisture comes from leaks, condensation, and high humidity. Food sources are everywhere—drywall paper, wood, cardboard, fabrics, and dust. If dampness persists for 24–48 hours, spores can colonize surfaces. In New Jersey, fluctuating temperatures and proximity to the coast amplify humidity and encourage condensation on cool surfaces.
Prevention begins with managing moisture. Learn where water enters and how it lingers. Check flashing and roof penetrations, inspect plumbing regularly, monitor basement walls after heavy rain, and use exhaust fans during and after showers.
Safety First for Beginners
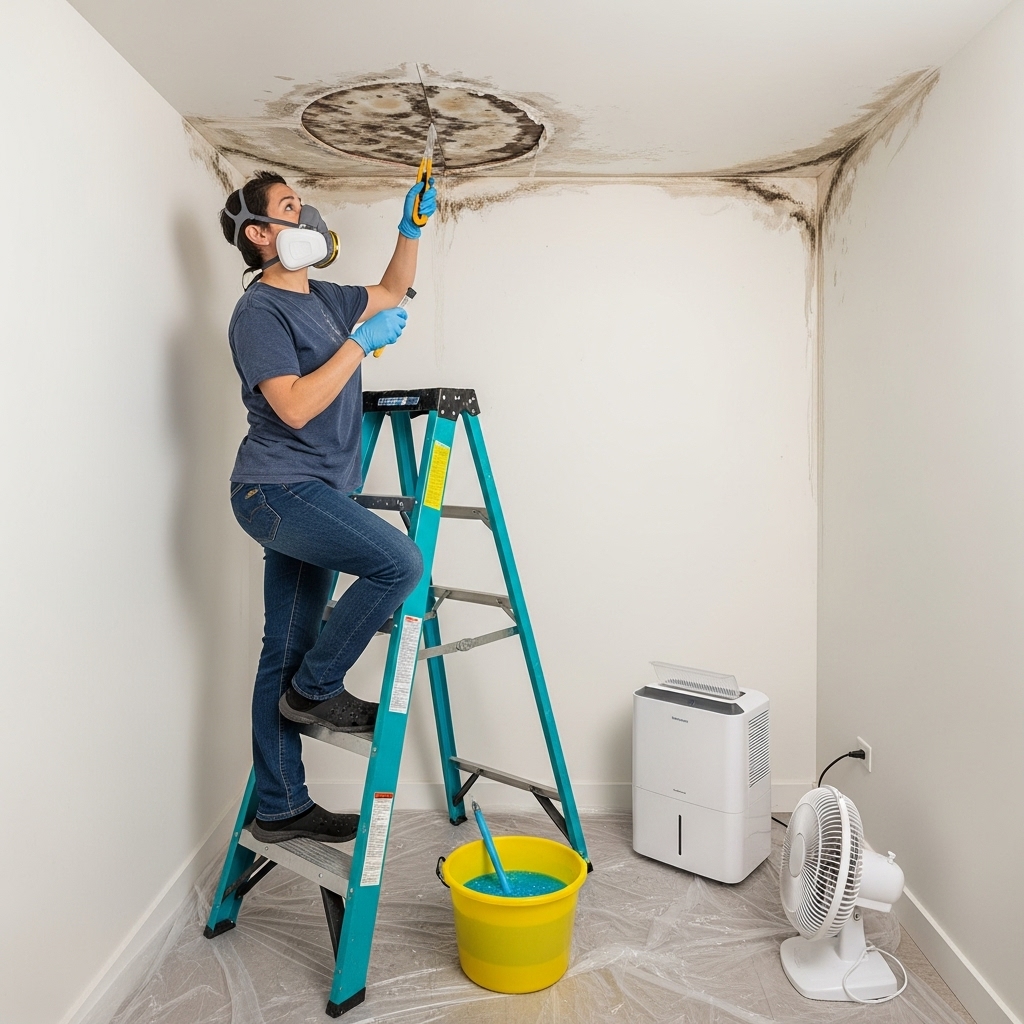
Even small jobs deserve basic protection. Wear a well-fitted respirator (N95 or better), gloves, eye protection, and clothing you can launder hot or discard. Keep children and pets away from the workspace. Avoid harsh chemical mixes; read labels and ventilate appropriately. Never dry-scrub mold—keep removal damp and controlled to reduce airborne particles.
Plan your route in and out of the work area. Place a mat or plastic just outside the entry where you can remove gloves and coveralls before walking through clean rooms. Keep cleaning supplies, bags, and tools inside the workspace to minimize trips.
Beginner-Friendly Tools and Supplies
- Protective gear: respirator, gloves, eye protection, disposable coveralls.
- Containment materials: plastic sheeting, painter’s tape, zipper door if available.
- Cleaning: non-ammonia detergent, EPA-registered disinfectant, clean rags.
- Dust control: HEPA vacuum for fine particles and spores.
- Moisture management: dehumidifier, fans for post-cleaning drying, hygrometer.
- Hand tools: utility knife, pry bar, scraper, and contractor bags for debris.
Step-by-Step Mold Removal for First-Timers
- Identify the moisture source. Look for leaks, condensation, or general humidity. Fix the cause—tighten fittings, re-caulk, repair roof leaks, or run dehumidifiers.
- Plan the workspace. Clear clutter, protect floors, and set up plastic to isolate the area. Turn off HVAC to prevent spreading spores through vents.
- Gear up. Put on your respirator, gloves, and eye protection before entering the workspace. Keep a trash bag open and ready.
- Remove porous, damaged materials. If drywall or insulation is soft, stained, or crumbling, cut out at least 12 inches beyond the discoloration to reach clean edges. Bag debris immediately.
- HEPA vacuum. Slowly vacuum all surfaces—studs, subfloor edges, nearby ledges—to capture fine particles.
- Detergent clean. Wash non-porous and semi-porous surfaces with a non-ammonia detergent, changing rags frequently.
- Disinfect. Apply an EPA-registered disinfectant and allow full contact time per label directions.
- Dry thoroughly. After cleaning, set up dehumidifiers and airflow to reduce moisture. Aim for 30–50% indoor relative humidity.
- Inspect and verify. Look for remaining stains or odors and re-check moisture with a meter if available. Do not rebuild until readings are normal.
- Rebuild smart. Use moisture-resistant materials in wet zones and improve ventilation to prevent a repeat.
Beginner Pitfalls to Avoid
- Skipping containment and tracking debris through the house.
- Relying on fragrances or paint instead of actual removal and drying.
- Mistaking a clean smell for a clean surface—verify with inspection and moisture checks.
- Running fans before cleaning, which can spread spores.
- Closing walls or reinstalling finishes before materials are dry.
Where Mold Hides in New Jersey Homes
Basements: Behind finished walls along foundations, under stairs, and near mechanical rooms where condensation collects. Address exterior drainage and run a dehumidifier during humid months. Keep storage off the floor and use sealed bins rather than cardboard.
Bathrooms: On ceilings, around shower tile edges, and under sinks. Improve exhaust fan performance, use a shower squeegee, and replace failing caulk with properly installed, mildew-resistant options after cleaning and drying.
Kitchens: Beneath sinks, at the back of dishwashers and refrigerators, and under flooring near leaks. Vent range hoods outdoors and inspect appliance water lines periodically.
Attics: Around roof penetrations, at sheathing where bath fans exhaust improperly, and along cold eaves where insulation is thin. Balance soffit intake and ridge exhaust to lower moisture and temperatures.
When to Call for Help
Beginners can accomplish a lot, but boundaries exist. If the area is large, if symptoms worsen while you work, or if you discover contamination inside ductwork, professional assistance is wise. Specialists can set up robust containment, use negative air machines, and document moisture readings and clearance results for your records. The goal is not to do everything yourself, but to know enough to act decisively and safely.
Mid-project uncertainty is common. If you reach a point where demolition, cleaning, or drying feels overwhelming, consult with professional mold removal providers for guidance or turnkey support. Even a brief consultation can refine your plan and prevent costly missteps.
Simple Prevention Habits for Beginners
- Keep indoor humidity between 30–50%. Use a hygrometer to monitor.
- Run bathroom fans during showers and at least 20 minutes afterward.
- Vent kitchen range hoods outside; avoid recirculating steam indoors.
- Fix leaks immediately and dry wet materials within 24–48 hours.
- Clean gutters seasonally and extend downspouts away from the foundation.
- Declutter damp-prone areas and store items in sealed plastic bins.
- Inspect plumbing connections, window sills, and door thresholds monthly.
Frequently Asked Questions
Can I use bleach to clean mold? Bleach can lighten stains but often fails to penetrate porous materials and may add moisture. Better results come from HEPA vacuuming, detergent cleaning, and proper disinfection, followed by thorough drying.
How do I know the area is dry enough to rebuild? Use a moisture meter if possible and confirm that humidity is consistently below 50%. Materials should feel dry, smell neutral, and show no new staining or condensation.
Do I need to test for mold? If you see visible growth and know the water source, removal and moisture control are the priorities. Testing can be useful for documentation or if the source is unclear.
Is it safe to run the HVAC during cleanup? It is best to shut down HVAC serving the work zone to prevent spreading spores. After cleanup and drying, replace filters and consider a professional duct inspection if contamination is suspected.
What if odors linger after cleaning? Persistent musty smells suggest residual moisture or hidden contamination. Re-check for leaks, increase dehumidification, and inspect concealed areas such as behind baseboards or under flooring.
Move Forward with Confidence
You do not need to be a contractor to succeed with small mold projects. With methodical steps—containment, removal, cleaning, disinfection, and drying—you can restore a healthier home and build habits that prevent future problems. When the task grows beyond your comfort level, partner with experienced mold removal specialists who can help you finish the job right the first time.