
Introduction
New Jersey’s mix of coastal humidity, older housing stock, and four-season weather makes indoor mold a common challenge for homeowners. Learning a clear, safe, and practical way to handle mold removal can help you protect your health, preserve your home’s value, and avoid repeated problems after storms, plumbing leaks, or condensation issues. This guide provides a step-by-step approach tailored to New Jersey conditions, from identifying the source of moisture to verifying that your home is dry, clean, and healthy again. Whether you live in a shore community facing salt air and seasonal flooding or in a suburban town with basements and crawl spaces, you will find strategies below that fit both common and complex situations.
Before you begin, remember two key principles: mold is a symptom of moisture, and safety comes first. If you remove visible growth but do not fix the water source, the problem will return. Likewise, if you clean aggressively without proper protection and containment, you risk exposing yourself and other rooms to spores. The sections below explain how to reduce risk while improving results, step by step, with tips specific to New Jersey’s climate and housing.
Know the Health and Home Risks
Mold can trigger allergy symptoms, aggravate asthma, and cause persistent odors that make living spaces uncomfortable. In New Jersey, unconditioned basements, damp crawl spaces, and insulated attics with poor ventilation often allow moisture to linger. Over time, this creates ideal conditions for mold on framing, drywall, carpet, and contents. Some growth is obvious—black or green patches on walls or ceilings—while other infestations hide behind baseboards, under vinyl flooring, inside HVAC return cavities, or within insulation. Understanding the scope is the first step to choosing the right method.
While most household mold types are manageable with careful cleaning and drying, extensive growth over large areas, widespread odors that persist, or a known sewage or contaminated water event may justify seeking professional help. When in doubt, start with a methodical inspection and keep notes; your documentation will guide your decisions and help you track progress as you move through the steps below.
Safety First: Personal Protective Equipment and Containment
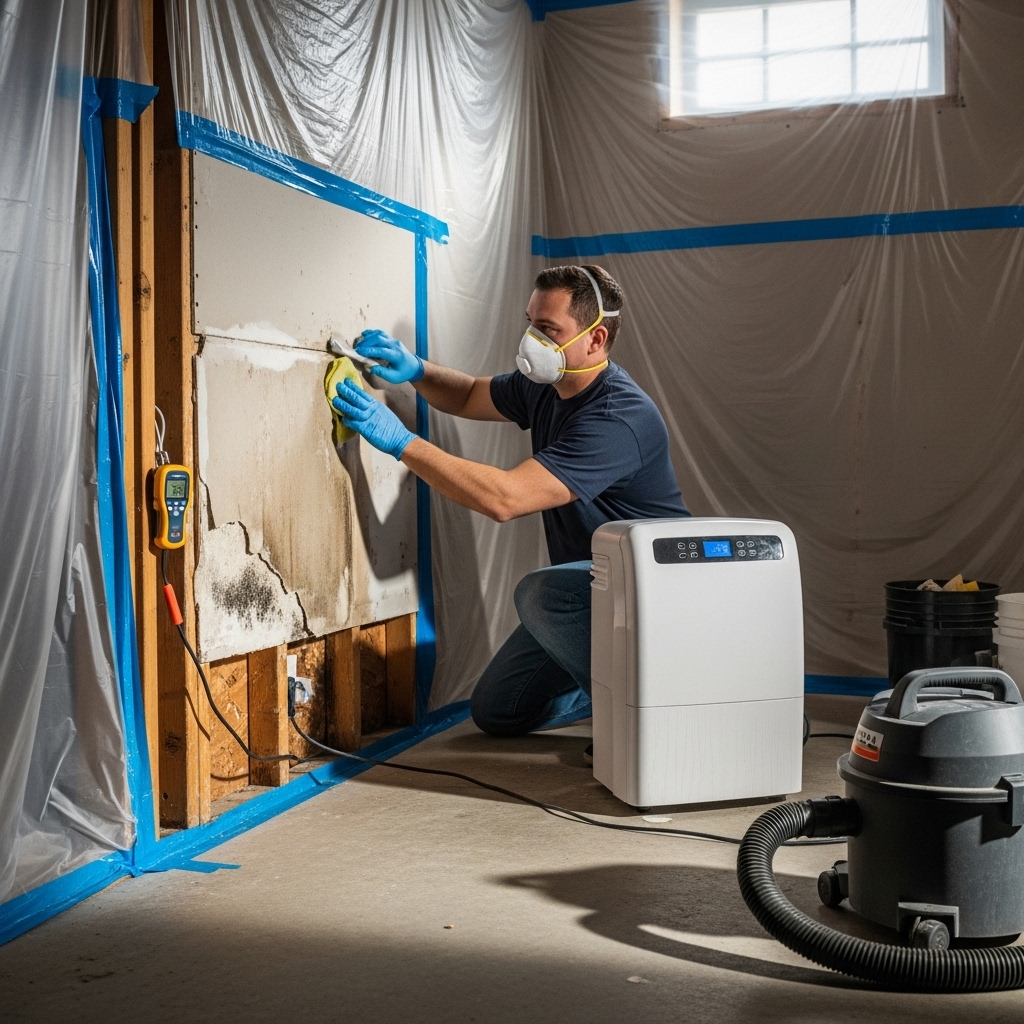
Always prioritize personal protection and room containment before disturbing mold. Minimal gear should include gloves, protective eyewear, and a respirator rated for fine particulates (commonly an N95 or better). Wear long sleeves and pants you can easily launder, and consider disposable coveralls for heavy work. Keep family members, pets, and anyone with respiratory sensitivities out of the work area until cleaning and drying are complete.
Containment is crucial to prevent spread. Close doors and, where practical, hang plastic sheeting to isolate the affected room or section. Use painter’s tape to seal vents temporarily, and establish a workflow that moves from the cleanest areas toward the most contaminated to avoid cross-contamination. If possible, create slight negative pressure by exhausting air to the outdoors through a window with a fan and a simple filter to help capture particulates. Always exhaust the air outdoors, never into an attic or another interior space.
Gather Materials
- Respirator and protective eyewear
- Nitrile or rubber gloves
- Plastic sheeting and painter’s tape
- Contractor bags for debris
- HEPA vacuum (true HEPA filtration)
- Non-ammonia cleaner and mild detergent
- White vinegar for light surface cleaning
- Disposable wipes or clean microfiber cloths
- Soft and stiff brushes for different surfaces
- Dehumidifier and fans for controlled drying
- Moisture meter or inexpensive hygrometer
- Utility knife and basic hand tools
Step-by-Step Mold Removal Plan
-
Stop the moisture. Find and fix the source before cleaning. Common New Jersey sources include leaky flashing after nor’easters, foundation seepage after heavy rain, pipe pinholes in finished basements, and humid summers that push condensation onto cool surfaces. Repair leaks, unclog gutters, adjust downspouts, seal foundation cracks as appropriate, and improve ventilation where needed.
-
Document the affected areas. Take photos, measure wall sections, and note materials (drywall, plaster, wood, carpet, insulation). This record helps you decide what to remove versus what to clean and establishes a baseline for post-cleanup verification.
-
Set up containment. Close doors, hang plastic sheeting, and gently reduce pressure in the room by exhausting to the exterior where safe. Keep tools and trash bags inside the contained zone to limit tracking spores through hallways.
-
Wear PPE and plan your workflow. Work from top to bottom and clean to dirty. Have a clean staging area outside containment where you can remove PPE and bag debris.
-
Remove porous, unsalvageable items. Carpeting, pad, drywall with visible mold growth, damp fiberboard furniture, and moldy insulation are usually best discarded. Cut drywall in neat sections, ideally following stud lines. Place debris directly into contractor bags, seal them, and remove them from the home promptly.
-
HEPA vacuum surfaces. Before wet cleaning, carefully vacuum walls, floors, studs, joists, and trim with a HEPA vacuum. Use brush attachments gently to lift dust without gouging surfaces. This step reduces spores and fine debris that would otherwise smear during wet cleaning.
-
Wet clean hard and semi-porous materials. Use a mild detergent solution on tile, sealed concrete, metal, sealed wood, and certain finished surfaces. Apply solution to cloths rather than spraying directly to minimize aerosolizing spores. Wipe in overlapping passes and change cloths frequently.
-
Address unfinished wood framing. On open studs or subflooring, scrub with a detergent solution and wipe thoroughly. Where staining remains but the wood is sound and dry, additional passes or a light sanding with appropriate PPE may be helpful. Always re-vacuum with HEPA after abrasion to capture dust.
-
Rinse and wipe dry. After cleaning, wipe surfaces with clean water-dampened cloths, then dry immediately to prevent renewed growth. Use fans for airflow but avoid blasting; even airflow is best to prevent dust plumes.
-
Dehumidify and monitor. Run a dehumidifier to maintain indoor relative humidity between 30% and 50%. In many New Jersey summers, this is the most important ongoing control. Use a hygrometer to check humidity and a moisture meter to track progress in wood or drywall.
-
Inspect HVAC. Replace filters, vacuum return grills, and consider having ducts inspected if the return plenum or nearby closet showed growth. Avoid running the central system during demolition to limit distribution of spores; resume once cleaning is complete and filters are upgraded temporarily to a higher MERV rating compatible with your system.
-
Rebuild thoughtfully. When replacing drywall in basements or bathrooms, choose moisture-resistant options where appropriate and maintain a small gap above floors to prevent wicking. Prime and paint with quality coatings and keep ventilation in mind during showers, laundry, and cooking.
Special Considerations for New Jersey Homes
Basements: Many Garden State basements are partly below grade and subject to seepage. Consider perimeter drainage and a sump system if recurring water enters after storms. Check window wells for proper covers and clear debris. Seal minor cracks and ensure exterior grading slopes away from the foundation.
Attics: Ice dams and warm, humid air from bathrooms and kitchens can drive moisture into attics where sheathing shows spots. Confirm bath fans vent outdoors, not into the attic. Improve insulation and baffles at eaves to keep soffits clear and reduce condensation on cold sheathing in winter.
Crawl Spaces: High water tables and sandy or marsh-adjacent soils can trap humidity. A well-installed vapor barrier and controlled ventilation or mechanical drying can reduce chronic dampness. Insulate ductwork to prevent condensate and ensure gutters keep water away from the foundation.
Middle Checks and When to Get Help
Partway through the work, pause to evaluate what you have accomplished. If more than a small area is affected, if odors remain strong, or if a sensitive family member is reacting, consider supplementing your efforts with professional mold removal. A pro can perform a more detailed inspection, improve containment, and use advanced HEPA filtration while advising on building science issues that cause repeat growth.
Keep your eye on data. Note humidity every day, track moisture content in wood, and log which rooms feel stuffy or musty. These observations will guide you to hidden leaks, disconnected bath fan ducts, or condensation-prone corners behind large furniture. Your notes will also be useful if you need to coordinate with contractors to adjust flashing, seal penetrations, or correct ventilation.
Post-Remediation Verification
Even if you are not conducting formal testing, you can still verify results with practical checks. Surfaces should look clean and dust-free, not just “less dirty.” Odors should be faint to non-existent. Relative humidity should hold under 50% for several days, and previously wet materials should measure dry with your moisture meter compared to unaffected areas. If you used containment, remove plastic sheeting carefully, keeping debris bagged and avoiding dragging dusty sheets through the home.
Run your dehumidifier for a week after work is done, especially during humid New Jersey summers. Increase normal ventilation by opening windows on mild days and running bath and kitchen exhaust fans during and after moisture-producing activities. If symptoms or odors persist, revisit the moisture source and check hidden spaces like back sides of baseboards, the underside of vinyl flooring, or the corners of closets with exterior walls.
Prevention and Long-Term Maintenance
- Keep indoor humidity between 30% and 50% year-round.
- Use bath and kitchen exhaust fans during activities and for 20–30 minutes afterward.
- Maintain gutters and downspouts; extend discharge away from the foundation.
- Run a dehumidifier in basements and crawl spaces during warm months.
- Insulate cold pipes to prevent condensation and dripping.
- Move furniture slightly off exterior walls to improve air circulation.
- Check attic ventilation and air sealing to prevent winter condensation.
- Inspect caulking around tubs, showers, windows, and exterior penetrations.
- Respond quickly to leaks—dry within 24–48 hours whenever possible.
- Replace HVAC filters regularly and keep return grills clean.
FAQ
Q: Can I use bleach to clean mold on walls? A: Bleach can lighten stains, but it does not address the underlying moisture and is not necessary for many building materials. Detergent, thorough wiping, and controlled drying are more important. Always ventilate and never mix cleaners.
Q: How do I know if I must remove drywall? A: If drywall is soft, crumbling, or shows broad mold growth, removal is usually best. Small surface spots on otherwise dry walls may clean up, but porous materials that were wet for more than 48 hours often need replacement.
Q: What humidity is ideal indoors? A: Aim for 30%–50%. In New Jersey summers, a dehumidifier in the basement can help the entire home feel drier and discourage condensation on cool surfaces.
Q: Do I need air testing? A: Not always. A clean look, neutral smell, dry readings, and resolved moisture sources often indicate success. If health concerns are present or the problem was extensive, consult a qualified professional for further evaluation.
Q: Is attic mold different from basement mold? A: The organisms may be similar, but the causes differ. Attic issues often stem from ventilation and air leakage; basements often involve seepage and humidity. Tailor the fix to the source.
Q: How long should drying take? A: Depending on materials and weather, 48–96 hours is common for surface drying, but deeper materials may take longer. Use meters to confirm.
Q: Can I paint over stained wood after cleaning? A: After thorough cleaning, drying, and HEPA vacuuming, a high-quality primer and finish can be applied to stained but sound wood, especially in utility spaces. Do not paint over damp or dirty substrates.
Protect Your Home Today
If you need help identifying hidden moisture, setting up airtight containment, or completing stubborn cleaning tasks, partner with local experts who know New Jersey homes. Whether you are finishing a basement renovation or addressing a post-storm issue, professional guidance can shorten the timeline and improve results. When you are ready to safeguard your home and breathe easier, consider professional mold removal to complement your efforts and keep your living spaces healthy for the long term.