
Bloomfield, New Jersey homeowners and property managers know that small moisture problems can quickly turn into big mold challenges. Between humid summers, heavy rains, and older housing stock with character (and often hidden leaks), the conditions for mold growth appear more often than anyone would like. This comprehensive guide provides a practical, step-by-step mold remediation and removal checklist tailored to Bloomfield’s climate, building styles, and common household scenarios. If you are facing visible growth or persistent musty odors, time matters. Early action helps protect indoor air quality, building materials, and your peace of mind. For those who prefer professional support, reputable teams specializing in mold remediation can streamline the process from inspection to restoration while maintaining rigorous safety standards.
This checklist is designed to be used in real homes and small businesses, not just laboratories or training rooms. As you read, keep in mind that mold is primarily a moisture problem. If you eliminate the source of moisture and manage indoor humidity, you stop the cycle. The mold itself can be removed and the affected area restored, but prevention hinges on identifying why mold grew in the first place. That is why this checklist intertwines moisture diagnostics with remediation steps, helping you avoid repeat issues in basements, bathrooms, attics, and behind walls.
Before you begin, know your limits. Some mold situations are simple surface cleanups, while others involve hidden structural damage, contaminated HVAC components, or water events that saturated multiple rooms. When in doubt, err on the side of safety and consider bringing in an indoor environmental professional or a qualified contractor. The following sections will walk you through the full scope—from initial safety and containment to cleaning, drying, and verification.
Understanding Mold In Bloomfield’s Climate
Bloomfield experiences a mix of muggy summers and cold winters, which means condensation risks shift throughout the year. In summer, warm outdoor air entering cool, air-conditioned spaces can condense on ducts, windows, and cold-water pipes, feeding mold. In winter, tightly sealed homes may trap moisture from cooking, showering, and drying clothes, especially if ventilation is inadequate. Older homes may have insufficient vapor barriers, dated insulation, and hairline leaks that go unnoticed until a musty smell or discoloration appears.
Common hotspots include basements with seepage or foundation hairline cracks, bathrooms lacking exhaust fans, kitchens with slow plumbing drips, and attics where poor ventilation causes condensation under roof decking. Pay special attention to window sills, drywall near baseboards, the back of closets, and any area with previous water damage. Mold spores are microscopic and ubiquitous; they only colonize surfaces when moisture persists. That is why a good checklist will always begin with moisture mapping and source control before removal and cleaning.
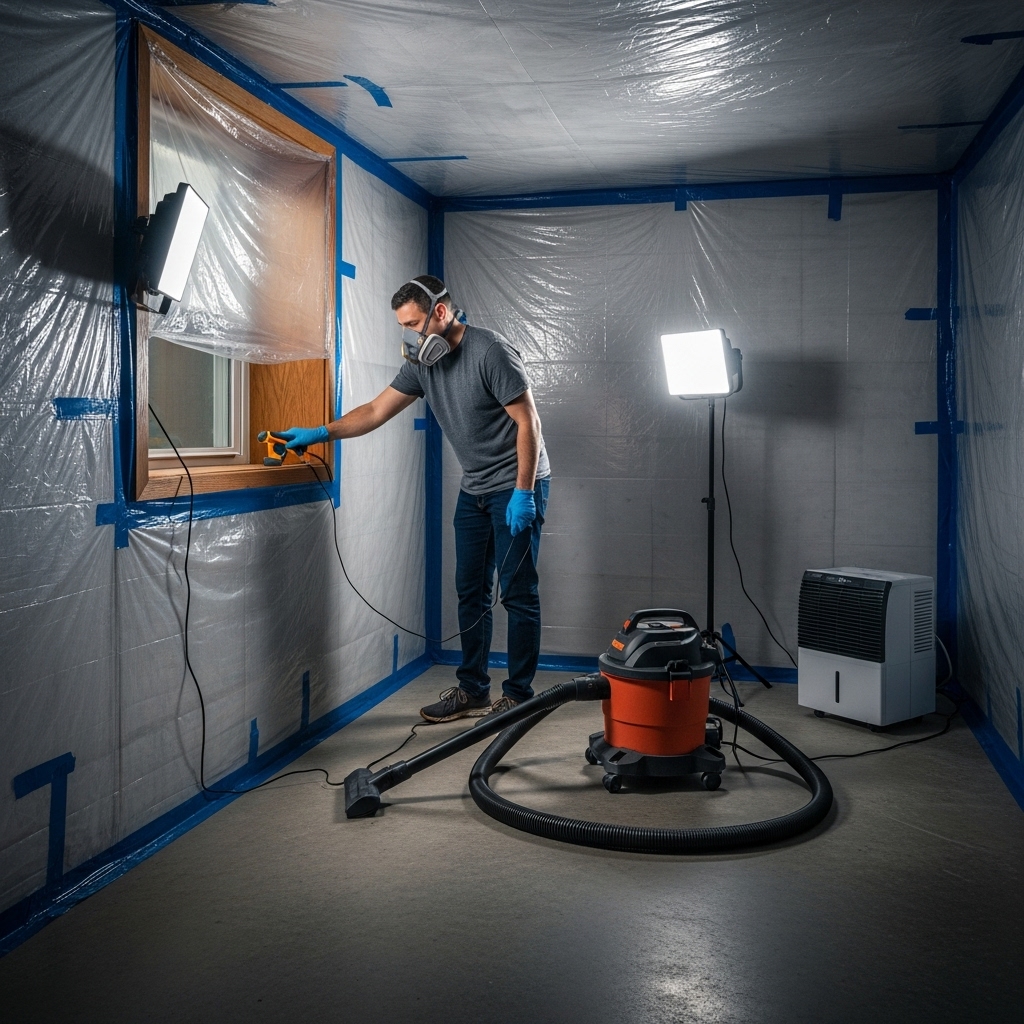
Safety First: Personal Protective Equipment And Site Prep
- Wear appropriate PPE: nitrile gloves, eye protection, and at minimum a well-fitted respirator (consult safety guidance for filter ratings). Avoid flimsy paper masks.
- Dress in clothing you can launder hot or bag for disposal. Use shoe covers when moving between affected and clean areas.
- Turn off HVAC systems that could spread spores, especially if the system runs through the affected area. Seal supply and return vents temporarily if needed.
- Establish a clean corridor so tools and debris do not spread contamination through hallways and stairwells.
- Keep pets and household members—especially individuals with allergies, asthma, or other sensitivities—out of the work zone.
Source Identification: Find And Fix Moisture
- Inspect plumbing fixtures, under-sink cabinets, toilet bases, and appliance lines for slow drips or corrosion.
- Check below-grade walls for seepage lines, efflorescence, or dampness that indicates seasonal groundwater pressure.
- Evaluate ventilation: ensure bathroom fans vent outdoors, not into attics. Confirm kitchen range hoods and dryers exhaust outside.
- Measure humidity if possible. Target indoor relative humidity below 50% in summer and winter alike, while balancing comfort and energy use.
- Look for condensation on windows, pipes, and ductwork; insulate or wrap cold surfaces to reduce temperature differentials.
- Address roof leaks, flashing failures, and gutter downspouts that discharge near the foundation.
Containment And Protection Of Clean Areas
Containment keeps moldy dust from spreading. For small, straightforward jobs, close doors, tape plastic sheeting over openings, and place a doormat or sticky mat at the threshold. For larger or dustier projects—like removing water-damaged drywall—create a negative pressure zone with a HEPA-filtered air scrubber exhausting outdoors. Seal HVAC vents in the work area and stage sealed bags or containers for debris. The goal is to remove affected materials without cross-contaminating the rest of the house.
Removal Of Damaged Materials
- Porous materials: Drywall, insulation, ceiling tiles, untreated particleboard, and certain textiles with embedded growth often need to be removed and discarded. Cut drywall at least a few inches beyond visible staining and dispose of it in sealed bags.
- Semi-porous materials: Wood framing and subfloors can often be saved with thorough cleaning, sanding or wire-brushing, and application of appropriate antimicrobial techniques, followed by proper drying.
- Non-porous surfaces: Tile, metal, and sealed plastics can typically be cleaned thoroughly with detergent and water, wiped, and HEPA vacuumed.
- Bag and seal: Double-bag contaminated debris and remove it carefully through the containment corridor to avoid leakage or rupture.
Removal is only as effective as your preparation. Keep cutting tools sharp, have extra bags ready, and stage your work so you move from the most contaminated areas toward the exit. When you finish a section, perform a preliminary clean and HEPA vacuum before opening another area. If at any point you feel the project is becoming unmanageable, pause and consider professional mold remediation to ensure proper containment, cleaning, and drying, especially if multiple rooms or the HVAC system are involved.
Cleaning Protocols: HEPA, Damp Wiping, And Dust Control
- HEPA vacuum all surfaces within the containment, including studs, subfloors, window sills, and exposed framing members.
- Damp wipe with a detergent solution to remove residues. Change cloths frequently and use clean water to avoid spreading debris.
- Use multiple passes: vacuum, wipe, and vacuum again. Each pass reduces particle load and improves final results.
- Pay attention to hidden ledges, electrical boxes, and trim grooves where dust settles.
- Avoid over-wetting during cleaning; excess moisture prolongs drying and can invite regrowth.
Drying And Dehumidification
Thorough drying is essential to prevent mold from returning. Use dehumidifiers sized for the room volume, run air movers to promote evaporation across surfaces, and keep the containment intact while drying continues. Monitor moisture in structural materials with a meter if available. In basements, consider ongoing dehumidification during humid months, along with sealing air leaks, insulating cold-water pipes, and maintaining clear exterior drainage lines.
Verification And Clearance
Once cleaning and drying are complete, perform a visual inspection under good lighting. There should be no visible dust, staining, or musty odors. A white glove or microfiber cloth test on horizontal surfaces should come away clean. Depending on the project scope, you may opt for third-party clearance testing to confirm that the environment meets appropriate standards before rebuilding. Documentation helps demonstrate due diligence, especially for rental properties, real estate transactions, or insurance claims.
Rebuild And Prevention
- Replace removed drywall with moisture-resistant panels in high-humidity areas (bathrooms and basements where appropriate).
- Prime and paint with quality coatings designed for damp-prone spaces.
- Upgrade ventilation: install or repair bath fans, add attic ventilation, and verify dryer venting.
- Improve drainage outdoors with downspout extensions and re-graded soil sloping away from the foundation.
- Add insulation or pipe wraps to reduce condensation on cold surfaces.
- Set indoor humidity targets and use a hygrometer to monitor.
Room-By-Room Checklist
- Basement: Inspect foundation walls, sill plates, and floor-wall joints; evaluate sump pump operation; check for high humidity; store items off the floor.
- Bathroom: Confirm functional exhaust fan vented outdoors; caulk tub and shower surrounds; inspect grout; dry towels and bathmats thoroughly.
- Kitchen: Check sink supply and drain lines; inspect dishwasher and refrigerator lines; run range hood during cooking to reduce steam.
- Attic: Look for roof leaks, wet insulation, or darkened sheathing; verify soffit and ridge ventilation; ensure bath fans do not vent into the attic.
- Bedrooms and Living Areas: Examine window sills for condensation, keep furniture slightly away from exterior walls, and avoid blocking supply vents.
- Laundry Area: Inspect washer hoses; vent the dryer outdoors; avoid drying clothes indoors where humidity spikes.
What Not To Do
- Do not paint over mold. Stains and growth must be removed, and the source of moisture resolved, before applying coatings.
- Avoid mixing cleaning chemicals. Stick to manufacturer instructions and ventilate adequately.
- Do not run the central HVAC during dusty demolition; you risk spreading contamination.
- Avoid ignoring the crawl space—standing water, torn vapor barriers, or unsealed soil can affect the whole home.
- Do not assume a musty smell is harmless. Odors often indicate hidden moisture and microbial growth.
Documentation And Communication
Keep a project log with dates, photos, moisture readings, and the steps you followed. Save receipts for materials and note any professional evaluations. If you rent out property, communicate clearly with tenants about the schedule, access needs, and safety precautions. For multifamily buildings, coordinate with other units to identify shared leaks or ventilation issues.
Frequently Asked Questions
How fast can mold grow after a leak? Mold can begin colonizing within 24 to 48 hours in the right conditions. That is why prompt drying—within the first day or two—is crucial after water intrusions.
Do I need to test for mold to start remediation? Not necessarily. If you see visible growth and know there is a moisture source, you can proceed with corrective action. Testing is useful for hidden problems, post-remediation verification, or sensitive environments.
Will dehumidifiers alone solve the problem? Dehumidifiers help control ambient humidity, but they will not fix active leaks, capillary wicking, or condensation caused by cold surfaces. Address the source first, then use dehumidification as part of prevention.
Can I keep living in the home during remediation? It depends on scope and sensitivities. For small, contained areas, residents may remain elsewhere in the home. For larger projects or when HVAC is involved, temporary relocation can be more comfortable and safer.
What about items like books, carpeting, and upholstered furniture? Porous items with moldy odors are hard to restore. Non-sentimental items are often best discarded. Some belongings can be cleaned with HEPA vacuuming and careful wiping, but evaluate value versus effort.
Is bleach recommended? Many professionals prefer detergent-based cleaning and physical removal, reserving biocides for specific situations. Over-wetting with any solution can extend drying time and risk recurrence.
Putting It All Together
A successful remediation follows a logical sequence: identify and stop moisture, contain the area, remove unsalvageable materials, clean and dry thoroughly, verify results, and rebuild with prevention in mind. Whether you tackle a small bathroom project or coordinate a whole-basement restoration after a storm, consistent methods produce predictable outcomes. If the job grows beyond your comfort zone, calling experienced mold remediation professionals can protect your home and time while reducing disruption.
Ready To Protect Your Bloomfield Property?
If you are dealing with a musty basement, a leaky bathroom, or recurring stains around windows, do not wait for the next humid stretch to make things worse. Take decisive steps using this checklist, and when you want expert support, reach out to a trusted local team for thorough inspection, containment, and cleanup. Restore healthy air, safeguard your home’s structure, and move forward with confidence by contacting professionals in mold remediation today.