
For many Bloomfield, New Jersey homeowners, mold shows up as a faint musty odor, a patch of discoloration near a window, or a suspicious stain on a basement wall. Left alone, small problems can spread, damage building materials, and affect indoor air quality. The good news is that a clear, methodical process can restore your home to a healthy state and reduce the risk of recurrence. If you are dealing with more than a small, localized patch—or if you simply want expert help—consulting trained professionals in mold remediation can make the process safer, faster, and more thorough from start to finish.
This guide breaks down residential mold remediation into manageable steps tailored to Bloomfield’s climate and housing stock. Whether your home is a classic colonial, a mid-century ranch, or a newer build, the principles are the same: identify and stop moisture, contain and remove contamination, clean and dry thoroughly, verify results, and rebuild with prevention in mind. Along the way, you will learn how to protect household members, your belongings, and the systems that keep your home comfortable.
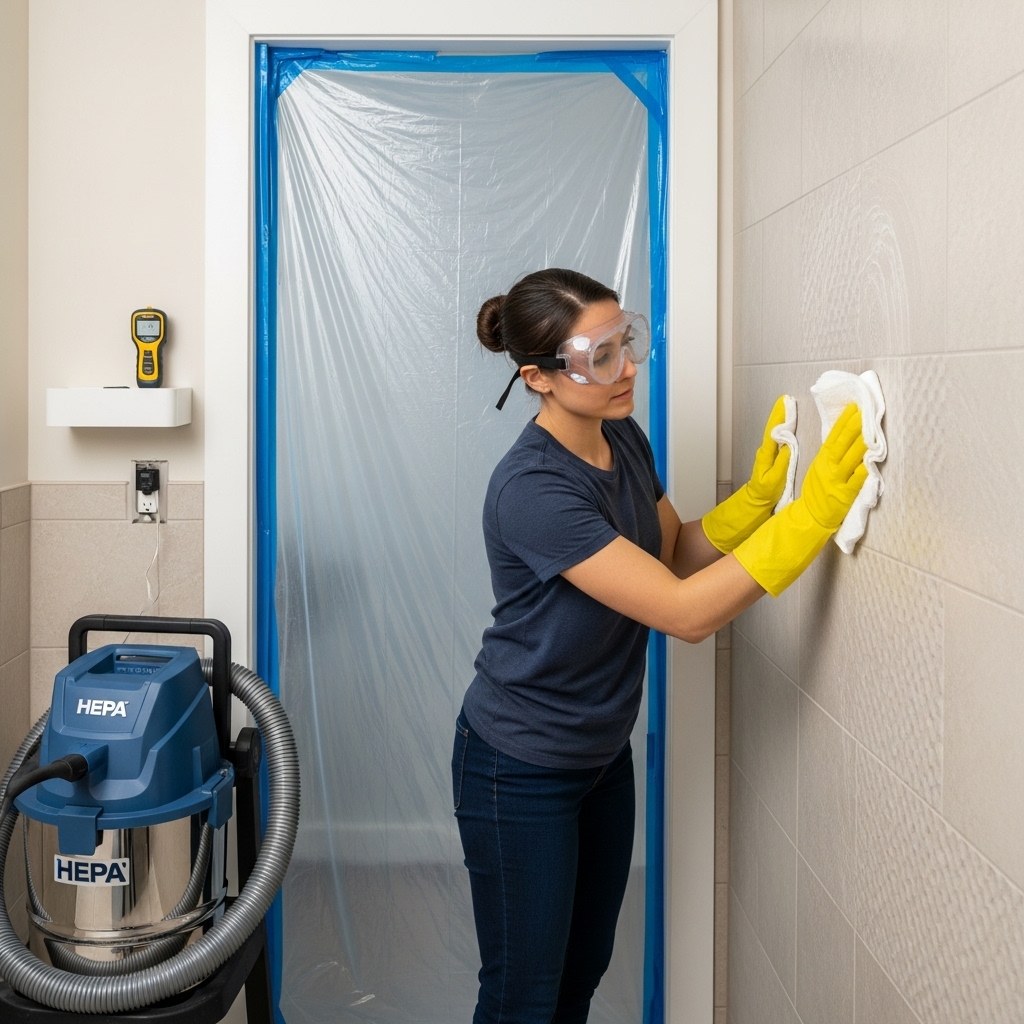
Step 1: Safety And Preparation
- Protective equipment: Use a well-fitted respirator as appropriate, gloves, and eye protection. Wear clothing you can launder on a hot cycle after work.
- Isolate the area: Close doors, seal openings with plastic sheeting, and place a doormat or sticky mat at the entrance to reduce tracking.
- Manage airflow: Turn off the HVAC system that serves the affected area to prevent distribution of dust and spores.
- Plan your route: Stage trash bags, tools, and cleaning supplies so you do not repeatedly cross clean areas with contaminated items.
Step 2: Locate And Fix Moisture Sources
- Inspect for plumbing leaks: Look beneath sinks, around toilets, behind appliances, and inside sink bases for corrosion or dripping.
- Check the building envelope: Examine roof penetrations, window flashing, and siding for gaps that admit water.
- Assess humidity: Use a hygrometer if possible and aim for indoor relative humidity below 50%.
- Address condensation: Insulate cold-water pipes, improve bath and kitchen ventilation, and avoid drying clothes indoors.
- Look underground: In basements, check for foundation seepage, efflorescence, or puddling near perimeter walls.
Step 3: Determine Scope And Create A Plan
Define how large the affected area is and whether multiple rooms or levels are involved. Small surface growth in a single bathroom differs from a basement wall that was wet for months. If materials like drywall, ceiling tiles, or carpet pads are saturated or colonized, plan for removal and replacement. Photograph the area before starting, and keep notes about moisture readings, odors, and the sequence of work. A clear plan reduces guesswork and helps you stay organized.
Step 4: Containment And Protection
Containment prevents cross-contamination. For small areas, sealing the doorway and creating a minimal negative pressure with a HEPA-filtered air scrubber is often sufficient. For larger jobs, you may build a full containment with zipper doors, sealed vents, and a dedicated waste path. Keep pets and family members out of the zone and post a simple sign to avoid accidental entry.
Step 5: Remove Unsalvageable Materials
- Porous materials like wet drywall, insulation, and ceiling tiles with visible growth should be cut out and bagged inside the containment.
- Semi-porous materials such as framing may be cleaned and dried if structurally sound. Use mechanical action—sanding or wire-brushing—followed by HEPA vacuuming and damp wiping.
- Non-porous surfaces like tile and metal can be cleaned with detergent solutions and wiped dry.
- Double-bag debris, wipe bags before removing them from the containment, and dispose of them responsibly.
Step 6: Clean Thoroughly
Cleaning is more than spraying a product and walking away. The objective is physical removal of mold and dust. HEPA vacuum horizontal and vertical surfaces, including studs, subfloors, and window sills. Follow with a damp wipe using a detergent solution. Repeat the process until cloths come away clean and the area passes a visual inspection under bright light. Pay attention to crevices, electrical boxes, and trim profiles where dust hides.
Step 7: Drying And Dehumidification
Proper drying locks in your progress. Use dehumidifiers to control ambient humidity and air movers to increase evaporation from damp surfaces. Keep the containment in place until materials reach acceptable moisture levels. In basements, ongoing dehumidification during humid months is a smart preventive strategy. Monitor conditions over several days to confirm stability.
Step 8: Verification And Optional Testing
Inspect the area thoroughly once drying is complete. There should be no visible growth, dust, or musty odors. Many homeowners choose to perform a white-cloth test on horizontal surfaces to check cleanliness. For peace of mind, you may consider third-party clearance testing, particularly for larger projects or when health sensitivities are a concern.
Step 9: Rebuild With Prevention In Mind
- Install moisture-resistant drywall in bathrooms and other damp-prone spaces.
- Use quality primers and paints designed for high-humidity conditions.
- Upgrade ventilation, including bathroom exhaust fans vented outdoors and improved attic airflow.
- Address outdoor drainage: extend downspouts and maintain grading that slopes away from the foundation.
- Insulate or wrap cold surfaces to reduce condensation.
Practical Tips For Bloomfield Homes
Older homes in Bloomfield often feature charming details—and aging building assemblies. If your home has plaster walls, check behind baseboards or in closets where air circulation is limited. In finished basements, look along the base of exterior walls for subtle rippling or staining of wall coverings. In winter, monitor windows and window wells for condensation; install insulating film if needed and wipe down moisture promptly. In summer, avoid setting the thermostat extremely low if you routinely open doors and windows, since warm humid air can condense on cool surfaces inside.
Protecting HVAC Systems
Central heating and cooling can spread dust and spores if not handled carefully. During remediation, shut off returns and supplies in the work zone or seal them temporarily. After work is complete, change filters, consider a professional duct assessment if there was heavy dust, and verify that condensate lines and pans drain freely. Insulate cold ductwork in unconditioned spaces to reduce condensation risk.
Frequently Asked Questions
Can I clean small areas myself? Many homeowners handle small, localized spots successfully with careful cleaning and moisture control. Wear appropriate protection and avoid over-wetting surfaces.
Do I need to throw away everything? Not necessarily. Non-porous items are often salvageable after careful cleaning. Porous items with persistent odors or visible colonization may not be worth the risk or effort to save.
Will paint alone fix it? No. Painting over mold without removal and moisture control can trap problems behind new coatings. Always address the cause and clean thoroughly first.
How can I prevent mold long-term? Keep humidity below 50%, maintain ventilation, repair leaks immediately, and perform seasonal inspections of attics, basements, and exterior drainage.
When should I call a professional? If multiple rooms are affected, structural materials are saturated, or the HVAC system is involved, experienced mold remediation services can manage containment, cleaning, drying, and verification efficiently.
A Step-By-Step Path Back To Healthy Living
Residential mold remediation is a process you can trust when you follow clear steps, protect your family, and prioritize moisture control. From the first sign of a leak to final repainting, consistency is your ally. If you are unsure, do not hesitate to seek help. A well-executed plan restores comfort, protects your investment, and keeps mold from returning.
Restore Comfort And Confidence In Your Home
Take action today if you notice musty odors, window condensation, or stained drywall. Use these steps to guide your cleanup, and when you prefer expert assistance, connect with local professionals who can inspect, contain, and restore efficiently. Reclaim fresh air and a healthier home by contacting trusted specialists in mold remediation serving Bloomfield and surrounding neighborhoods.