
What to expect during a mold inspection in Bloomfield
Whether you are buying a house, investigating a musty odor, or verifying the success of prior repairs, understanding the inspection process will reduce stress and lead to better decisions. Bloomfield’s climate, older housing stock, and mixed construction styles require a careful, methodical approach. From the first call to the final report, here is how a thorough evaluation unfolds and how to prepare your home for the best results. If you prefer to skip the guesswork, you can request a professional mold inspection and let certified specialists guide you through each step.
Every home is unique, and the inspection should reflect that. The steps described below outline the typical flow and the reasoning behind each stage, so you understand not only what happens but why it matters.
Initial conversation and planning
The process usually begins with a pre-inspection interview. You will be asked about the building’s age, recent leaks or storms, renovation history, HVAC changes, room comfort complaints, odors, and any known water events. This conversation sets priorities and identifies sensitive areas such as attics, basements, or bathroom stacks. An appointment is scheduled at a time when access to all rooms, utility spaces, and exterior areas is possible.
Arrival and safety walkthrough
On site, the inspector confirms access, reviews your concerns, and outlines the plan. Basic safety checks include electrical hazards, access barriers, and structural stability in attics or crawl spaces. The goal is to work efficiently while keeping occupants safe and minimizing disturbance to belongings.
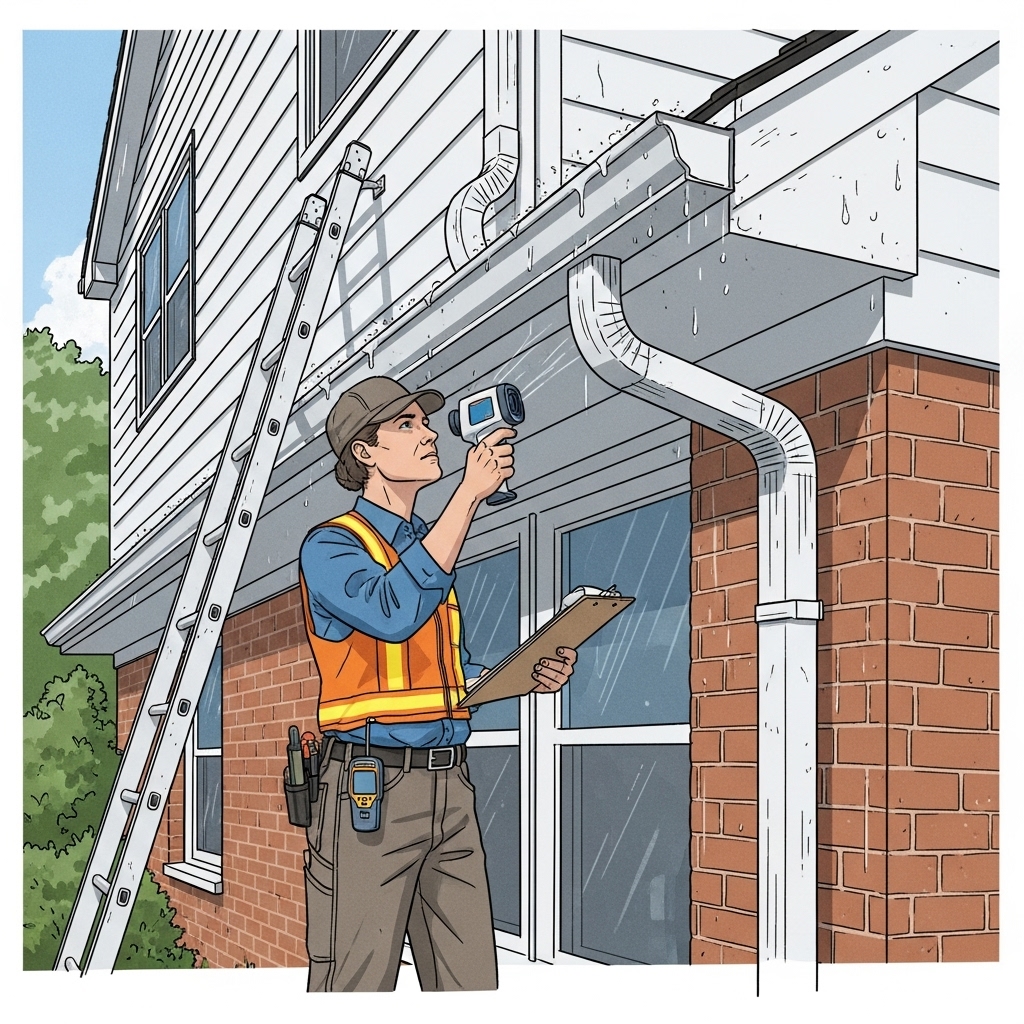
Exterior evaluation
The exterior tells the home’s moisture story. Inspectors observe roofing, gutters, downspouts, grading, siding, window and door flashing, and penetrations such as vents and chimneys. They look for pathways that could allow liquid water or humid air to reach interior materials. Notes and photos document suspect conditions so the interior assessment can follow the clues.
Interior visual survey
Inside, inspectors start with the areas linked to your concerns and then cover the rest of the home. They look for stains, warping, peeling paint, buckling floors, and signs of prior patching that might conceal repeated leaks. Odor patterns are important, especially in closets, under sinks, and along exterior walls. If a room feels unusually cool or humid, that observation becomes part of the working hypothesis.
Moisture mapping and tools
Beyond the eye test, professionals use non-invasive moisture meters and, when useful, thermal imaging to find hidden moisture. These tools highlight cold, damp areas behind walls or under flooring and help distinguish between an active leak and old staining. Measurements are taken methodically and logged so that recommendations can be tied to objective data, not just impressions.
HVAC and ventilation review
The inspector evaluates air handling equipment, filters, condensate drains, supply and return registers, and localized ventilation such as bathroom and kitchen exhausts. Inconsistent airflow or blocked ducts can create microclimates that foster condensation. If equipment is set in a damp basement or closet, the environment around it is checked carefully.
Attic, basement, and crawl space focus
These spaces often make or break a home’s moisture control. In attics, inspectors look for roof leaks, inadequate ventilation, disconnected bath fan ducts, and insulation contact with roof sheathing. In basements and crawl spaces, they assess foundation seepage, vapor barriers, sump systems, and the condition of wood framing at sill plates and rim joists. Odors and visible growth, if present, are documented without disturbance.
Sampling decisions explained
Sampling is not automatic. It is selected when it will change the plan, clarify uncertainties, or provide a baseline for clearance. Air sampling can indicate the presence of mold particles in the breathing zone and help compare indoor to outdoor conditions. Surface sampling can confirm if discoloration is biological and whether cleaning or removal is appropriate. The inspector explains the options and limitations before proceeding.
Interpreting findings
Findings are interpreted in context. A single elevated moisture reading near a door might be a transient spill, while readings across a baseboard may reveal a chronic leak. The inspector correlates visual cues, tool data, odor notes, and building design to build a coherent explanation. Recommendations focus first on source control, then on addressing affected materials, and finally on preventing recurrence.
Communication during the visit
Expect clear, jargon-free explanations. Good inspectors show you photos, discuss options, and outline the immediate steps you can take while awaiting the full report. If urgent issues are found, such as an active leak, they will recommend stabilizing actions the same day to prevent additional moisture accumulation.
The written report
After the visit, you receive a structured report that documents observations, measurements, photos, sampling results if performed, and prioritized recommendations. The report should be specific enough for you or a contractor to act on it without guesswork. It becomes a roadmap for remediation and for verifying success afterward.
What you can do to prepare
Before the appointment, declutter areas under sinks, clear access to the attic hatch, move boxes away from basement walls, and make sure pets are secured. Write down your top concerns and the history of any leaks or odors. Running bathroom and kitchen exhaust fans for a few minutes before the visit can help reveal airflow performance.
Special considerations for Bloomfield homes
In Bloomfield, older homes often have layered renovations and mixed materials. That means transitions between old and new flashing, different insulation strategies, and tricky ventilation paths. Inspectors familiar with local building styles recognize common patterns, from ice-dam staining on north-facing roof sections to basement seepage along specific foundation joints.
When rapid response matters
If you discover a fresh leak, quick stabilization is crucial. Shut off water to the affected line if plumbing is involved, capture runoff into containers, and ventilate the area. Take photos and note the time you discovered the issue. Even after you implement temporary fixes, scheduling a professional follow-up ensures the moisture source is fully understood and that drying is verified.
Mid-process guidance you can use
While waiting for the full report, you can start with source control: fix obvious drips, improve grading, clean gutters, and run dehumidification in damp rooms. Avoid aggressive cleaning of suspect areas before documentation. If you are uncertain about the extent of the problem, a targeted mold inspection will help you avoid guesswork and prioritize the most effective steps.
After the inspection
Once recommendations are in hand, address moisture sources first. Then remediate or replace affected materials according to the report. After corrective work, a follow-up evaluation may be advised to confirm that moisture has normalized and that cleaning or removal met the target outcomes. Keep all documentation organized for future reference or real estate disclosures.
Frequently asked questions
Question: How long does a typical inspection take? Answer: Time varies with home size and complexity, but most single-family homes can be evaluated in a single visit. If sampling is performed, laboratory turnaround adds additional days for interpretation.
Question: Do I need to leave the house during the inspection? Answer: Generally, no. Inspectors work around occupants and coordinate access room by room. They may ask you to avoid running humidifiers or large ventilation changes during the visit to keep conditions consistent.
Question: Will the inspector open walls? Answer: Non-destructive methods are preferred. If the situation warrants invasive exploration, that is discussed beforehand and is typically scheduled with proper containment and protection in place.
Question: Is sampling always necessary? Answer: Not always. It is performed when it adds clarity or confirms that remediation met objectives. The decision depends on the goals of the inspection and the evidence found.
Question: What if I am buying a home? Answer: Coordinate the inspection during your due diligence period and request access to attics, basements, and utility spaces. The findings help you plan immediate maintenance and long-term moisture management.
Move forward with confidence
Understanding the process removes uncertainty and helps you act decisively. If you notice odors, stains, or dampness, do not wait for the next rainy day to find out what is going on. Bring in experienced help, follow the recommendations, and protect your investment and health. When you are ready to take the next step, schedule your professional mold inspection and get a clear plan tailored to your Bloomfield home.