
A Complete Step-by-Step Mold Remediation Guide for Bloomfield Homes
Whether you live near Watsessing Park or along the bustling corridors of Bloomfield Avenue, controlling moisture and removing mold properly is essential to protecting your home and your health. The following step-by-step guide outlines a practical, standards-aligned approach to identifying the source, containing the affected area, cleaning and removing contaminated materials, and verifying a successful outcome. Use it to understand what a thorough project looks like, to prepare your household, and to hold contractors accountable. Early in the process, explore how a professional handles mold remediation so you can compare methods, safety controls, and communication practices before work begins.
Step 1: Initial Contact and Information Gathering
Good projects start with accurate information. When you call a remediation company, be ready to describe the type of building, the location of concern, any recent leaks or flooding, odors, visible staining, and occupant symptoms. Photos and short videos help the provider understand access limitations and safety hazards. This initial exchange sets expectations about response time, inspection length, and what preparations you should make before a site visit.
If there has been recent water intrusion, ask what you can do safely before professionals arrive. Simple actions like shutting off a leaking supply line, moving small items to a dry space, and increasing ventilation can reduce damage. Avoid disturbing visible mold; brushing or vacuuming without HEPA filtration can spread spores.
Step 2: Inspection and Moisture Diagnostics
During the on-site inspection, the assessor visually examines the affected area and adjacent spaces. They should measure moisture in building materials and note temperature and relative humidity. Thermal imaging can reveal cold, damp zones behind surfaces. In basements, the assessor looks for signs of foundation seepage, efflorescence, and poor drainage outside. In bathrooms and kitchens, they check for failed caulk, slow leaks, and mechanical ventilation that may not exhaust outdoors.
The assessor’s goal is to define the extent of contamination and the moisture source. Without source control, remediation results will not last. Expect a written summary that lists suspected sources, affected materials, and recommended next steps.
Step 3: Scope of Work and Planning
A written scope aligns the entire team around goals and methods. It should describe containment boundaries, airflow strategy, personal protective equipment, material removal versus cleaning decisions, and verification criteria. The scope also outlines communication protocols, including daily updates, photo documentation, and a final summary. For complex projects, a project map with marked containment zones and equipment locations prevents confusion once work starts.
Planning also addresses logistics: access points, parking, noise restrictions, and hours of operation. Discuss how the company will protect hallways and stairs, where equipment will be staged, and how debris will be removed without contaminating clean areas.
Step 4: Site Preparation and Occupant Safety
Before containment goes up, remove small personal items from the work area and adjacent rooms. Cover furniture and electronics that must stay. Determine whether pets should be relocated during loud or dusty phases. Review rules for entering and exiting containment, and confirm that children will not have access to work zones. Safety briefings reduce stress and keep everyone focused.
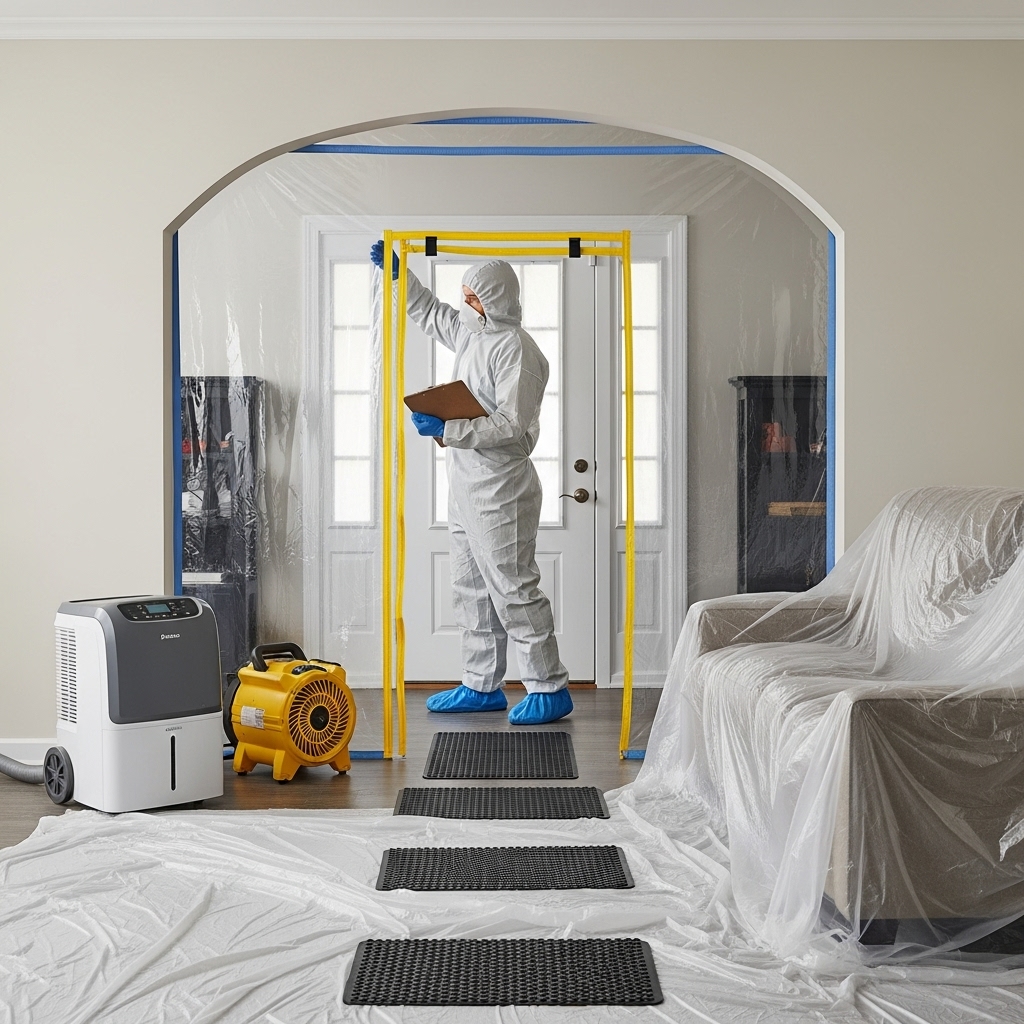
Step 5: Containment and Engineering Controls
Containment prevents spores and dust from spreading. Install plastic barriers from floor to ceiling, seal penetrations, and use zipper doors for access. Negative air machines equipped with HEPA filters exhaust air out of the work area, creating directional airflow. The team should confirm negative pressure and monitor it throughout the project. HVAC registers in the work zone should be sealed or the system shut down to avoid cross-contamination.
For multi-room projects, a decontamination chamber allows workers to remove dusty PPE and tools before entering clean spaces. Sticky mats at entrances capture debris from footwear. Daily HEPA vacuuming of transition areas keeps the rest of the home clean.
Step 6: Source Control and Structural Drying
Fix the moisture source as early as possible. Repair leaks, correct drainage, and adjust ventilation. Structural drying uses dehumidifiers, air movers, and heat to bring materials back to a normal moisture range. Technicians monitor progress with moisture meters and record readings so adjustments can be made. Drying is often the pacing factor in a project; patience here prevents future problems.
Step 7: Removal of Porous Materials
Porous materials with mold growth—drywall, insulation, certain ceiling tiles—are typically removed. Demolition inside containment limits dust spread. Waste is bagged, sealed, and removed along planned routes. The team should cut drywall to clean lines, avoiding ragged edges that complicate repairs. Exposed cavities are then cleaned and dried before new materials are installed by you or another contractor.
Step 8: Detailed Cleaning and HEPA Filtration
Cleanable surfaces are addressed with a sequence: HEPA vacuum to capture settled spores and dust, damp wipe with appropriate cleaners, and a second HEPA vacuum after surfaces are dry. Wood framing may be wire-brushed or lightly abraded to remove embedded growth. Floors and horizontal surfaces receive extra attention because spores settle there. Air scrubbers with HEPA filters run during cleaning to capture airborne particles.
Step 9: Post-Cleaning Verification
Verification confirms that the work achieved its goals. This includes a visual check for dust, debris, and staining; moisture readings to confirm materials are within normal range; and clear documentation. In some cases, third-party testing is used, particularly when occupants have sensitivities or the project is large. Verification criteria should be discussed and agreed upon before work begins.
Step 10: Demobilization and Prevention Guidance
Once verification is complete, containment is removed carefully to avoid stirring settled dust. Equipment is demobilized, and paths are cleaned. The final report summarizes what was done, where, and why, and it includes moisture data and photos. Prevention guidance may include recommendations for dehumidification, ventilation improvements, exterior drainage adjustments, and regular inspections of bathrooms, kitchens, and basements.
Bloomfield-Specific Considerations
Homes in Bloomfield face unique moisture challenges: older foundation walls, stack effect in multi-story properties, and dense tree canopies that shade roofs and slow drying after rain. Seasonal humidity fluctuations stress HVAC systems, causing condensation on supply ducts and cool surfaces. A thorough remediation plan accounts for these realities with better air sealing, insulation strategies that avoid trapping moisture, and ventilation that actually exhausts outdoors.
Homeowner Checklist: Before, During, and After
- Before Inspection: Gather a history of leaks, flood events, and repairs. Note odors and when they are strongest. Clear access to affected spaces.
- Before Work: Remove personal items, plan pet care, and review containment areas and traffic routes with the contractor.
- During Work: Expect daily updates, photos, and moisture readings. Respect containment boundaries and follow safety instructions.
- Cleaning Phase: Keep HVAC adjustments as directed. Avoid entering the work zone. Ask for mid-project photos of cleaned cavities and surfaces.
- Verification: Walk the space with the contractor. Review moisture readings and the visual cleanliness standard. Clarify any open questions before containment is removed.
- After Work: Implement prevention recommendations—dehumidification, ventilation, and exterior maintenance. Schedule follow-up checks after the next heavy rain or seasonal change.
Common Mistakes to Avoid
- Skipping source control and focusing only on visible growth.
- Inadequate containment that allows spores to spread to clean rooms.
- Turning on the central HVAC during demolition or cleaning within the work zone.
- Rushing through drying rather than waiting for materials to reach normal moisture levels.
- Under-documenting the project, which makes future repairs or claims more difficult.
Working With Professionals
A well-organized contractor explains each step, invites questions, and adapts to hidden conditions with documented changes. They coordinate with other trades when plumbing, roofing, or HVAC adjustments are necessary. Their team follows safety protocols, uses appropriate PPE, and treats your home with respect. When you evaluate providers, compare not only their experience but also their process discipline and transparency.
Mid-Project Reality Check
Midway through a typical Bloomfield remediation—often after demolition and preliminary drying—you should see clean, contained work zones, negative air machines running, and documented moisture trends moving in the right direction. If the project is not meeting targets, ask for a plan adjustment. Proactive course correction is a hallmark of quality. It is also the right time to revisit how the contractor defines successful mold remediation, ensuring your expectations align with the verification criteria agreed upon at the outset.
Frequently Asked Questions
Q: Do I need testing before starting? A: Not always. Many projects rely on inspection and moisture diagnostics to define the scope. Testing can be helpful in complex scenarios or when occupants have sensitivities.
Q: Can I clean small spots myself? A: Small areas on non-porous surfaces may be safe to clean with appropriate precautions. However, if the area is larger, if porous materials are involved, or if there is a hidden moisture source, professional help is recommended.
Q: How long will it take? A: Duration varies. The biggest variable is drying time, which depends on material thickness, initial moisture, and environmental conditions.
Q: What happens to my belongings? A: Items may be cleaned on-site, moved to a clean room, or sent to specialized cleaners depending on material type and contamination.
Q: Will the smell go away? A: Odors usually diminish as materials dry and contaminated dust is removed. Persistent odors suggest an unresolved moisture source or hidden contamination.
Q: What are the signs of a good job? A: Clear containment, proper PPE, orderly work areas, documented moisture readings, and a space that is visibly clean at the end.
Moving Forward With Confidence
With a clear, step-by-step plan, you can manage a remediation project confidently and reduce stress for your household. Focus on source control, containment, and measurable verification, and insist on solid documentation. If you are preparing to start and want a result that lasts, reach out to a local professional who prioritizes thorough, health-centered mold remediation and will guide you from first inspection through final prevention recommendations.