
Comprehensive Mold Remediation Steps Checklist for Bloomfield, New Jersey Homes
A clear, detailed checklist transforms a stressful mold problem into a manageable project. In Bloomfield, New Jersey—where humid summers, older basements, and seasonal storms can challenge even well-kept homes—having a step-by-step plan reduces risk, controls dust, and prevents recurrence. This guide presents a practical checklist you can adapt to your home and scope, whether you are tackling a small, contained area or coordinating a larger project with professionals.
The checklist is organized into phases: prepare and assess, stop the water, contain the area, remove contamination, clean thoroughly, dry to targets, verify results, and prevent recurrence. Each phase includes tasks, tips, and acceptance criteria so you know when to move forward. If your scope grows or specialized hazards appear, consider bringing in a local expert in mold remediation to help tailor and execute the plan.
Phase 1: Preparation and Safety Planning
- Gather tools: flashlight, hygrometer, moisture meter, painter’s tape, plastic sheeting, tape, utility knife, heavy-duty bags, HEPA vacuum, detergent cleaner, and disposable wipes.
- Identify occupant sensitivities: asthma, allergies, or immune conditions may influence containment level and scheduling.
- Check for potential lead or asbestos in older Bloomfield homes before any cutting or sanding.
- Plan traffic routes for workers and debris to minimize cross-contamination.
- Establish a clean/dirty boundary and set up a staging area for PPE.
Phase 2: Moisture Source Control
- Inspect the exterior: clean gutters, extend downspouts, and correct grading so water flows away from the foundation.
- Check the roof and flashing after storms for leaks and quickly repair failures.
- Verify bathroom and kitchen exhausts vent outdoors and operate effectively.
- Repair plumbing leaks and insulate cold pipes to reduce condensation.
- Set indoor humidity targets between 30% and 50%; prepare dehumidifiers for basements during humid months.
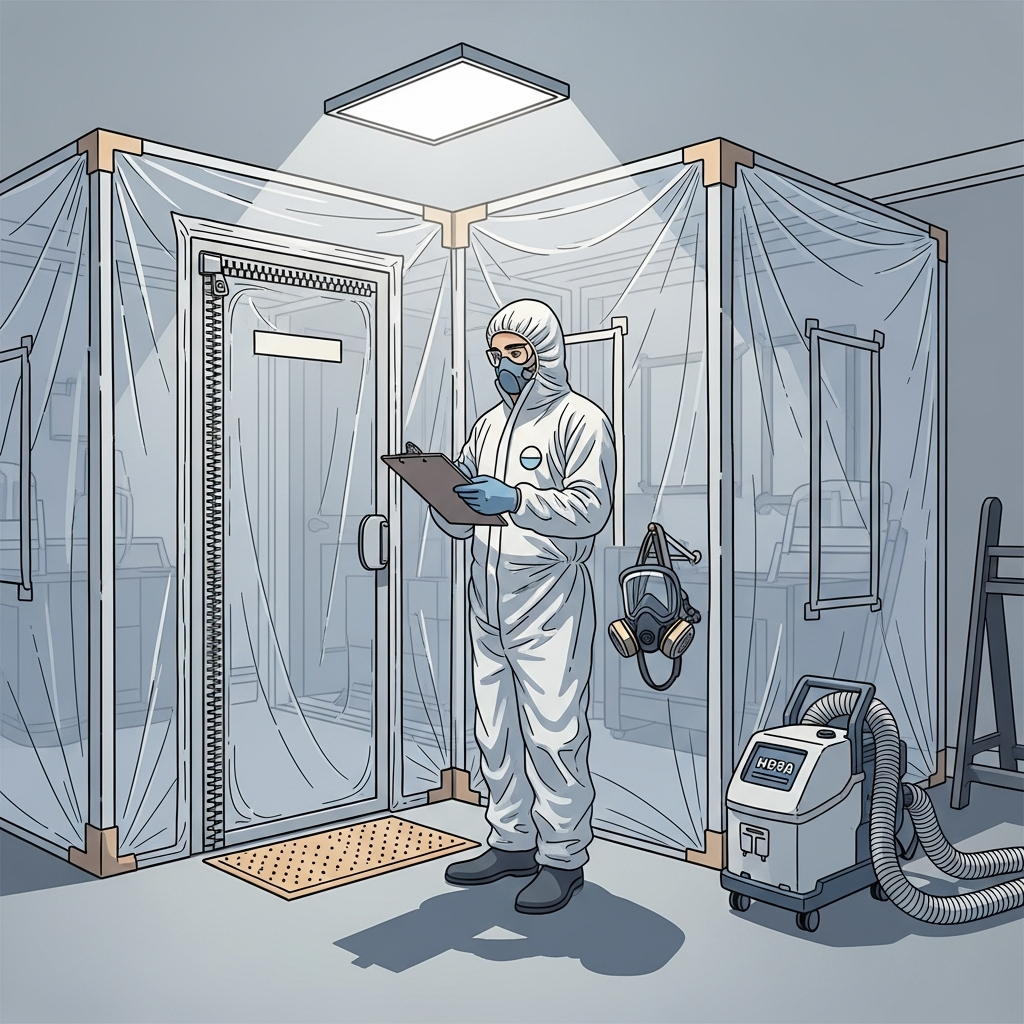
Phase 3: Containment and Air Management
- Isolate the work area with plastic sheeting from floor to ceiling; seal HVAC vents.
- Create a single entry with a zipper door and place sticky mats at the threshold.
- Run a HEPA air scrubber within containment; use negative pressure for larger projects.
- Post signs to keep family members and pets out of the work zone.
- Shut off or isolate the central HVAC serving the work area during demolition.
Phase 4: PPE and Safety Practices
- Wear appropriate respiratory protection: N95 or P100 filters depending on scope.
- Use goggles, nitrile gloves, and disposable coveralls or dedicated work clothing.
- Change gloves and wipes frequently to avoid spreading contamination.
- Remove PPE carefully at the boundary to prevent carrying dust into clean areas.
Phase 5: Removal of Unsalvageable Materials
- Identify porous materials with embedded growth—drywall, carpet pad, certain ceiling tiles—and remove them beyond visible staining.
- Cut neatly and bag debris inside the containment; double-bag for safety.
- Mist lightly to suppress dust during cutting and prying.
- Transport sealed bags directly outdoors along a protected path.
Phase 6: Cleaning of Salvageable Surfaces
- HEPA vacuum all surfaces to capture loose spores and dust.
- Damp wipe with a detergent solution; scrub semi-porous materials like wood framing as needed.
- Rinse or replace cleaning tools frequently; use fresh cloths to avoid redepositing residues.
- Finish with a second HEPA vacuum after surfaces dry to remove remaining fines.
Phase 7: Drying and Environmental Stabilization
- Use dehumidifiers and air movement, when appropriate, to reach dry targets.
- Measure moisture in materials and compare to unaffected areas to set acceptance criteria.
- Maintain indoor relative humidity in the 30% to 50% range throughout drying.
- Keep containment in place until acceptable moisture readings and cleanliness are achieved.
Phase 8: Verification and Clearance
- Perform a bright-light visual inspection; no visible growth should remain.
- Check horizontal surfaces for dust; a wipe test should come away clean.
- Confirm moisture readings meet targets relative to unaffected comparators.
- Document with photos and a brief summary of the steps completed.
Phase 9: Rebuild and Finish
- Replace insulation, drywall, and trim only after clearance criteria are met.
- Use caulk and sealants to reduce air leaks and future moisture pathways.
- Select moisture-tolerant finishes for bathrooms and basements.
Acceptance Criteria Checklist
- Moisture source identified and corrected.
- Containment installed correctly with controlled airflow.
- Unsalvageable materials removed beyond visible boundaries.
- Surfaces HEPA-vacuumed, damp-wiped, and re-vacuumed.
- Dehumidification achieved sustained target levels.
- Area passes visual and wipe tests; no musty odors remain.
Documentation Tips
Keep a simple but complete record: date-stamped photos, moisture logs, humidity readings, and a floor plan with marked areas. This record supports quality control, helps coordinate with contractors, and provides reassurance for sensitive occupants. In larger projects, a concise report that includes before-and-after measurements and a summary of steps can be invaluable for future reference.
Bloomfield-Specific Considerations
Many Bloomfield homes feature finished basements that double as living spaces. Focus on bulk water control outside—gutters, downspouts, and grading—so your interior work lasts. Vent bathrooms and laundry areas effectively. In winter, be alert for condensation on windows and cold corners, which can create localized humidity spikes. In summer, run dehumidifiers early and consistently rather than waiting for a damp smell to appear.
Common Mistakes to Avoid
- Painting or sealing over growth without removal and drying.
- Running household fans during demolition, which spreads dust and spores.
- Skipping containment in the belief that a “small job” cannot spread contamination.
- Stopping dehumidification too soon, leading to rebound dampness.
- Neglecting HVAC filters and ducts that may have collected dust during work.
Mid-Project Quality Checks
Before moving from one phase to the next, pause to confirm goals are met. Is the leak truly fixed? Are humidity readings within range? Does the air scrubber show a pressure differential that favors clean-to-dirty flow? Are wipe tests coming back clean? Small course corrections now prevent major setbacks later. If conditions prove more complex than expected, consult a Bloomfield-area professional experienced in mold remediation to recalibrate the plan without compromising safety.
Frequently Asked Questions
Q: How do I decide between removal and cleaning? A: Porous materials with embedded growth are usually removed. Semi-porous and non-porous surfaces can often be cleaned if structurally sound and dried to target levels.
Q: What humidity should I maintain during and after remediation? A: Keep indoor relative humidity between 30% and 50%. Basements in Bloomfield often require dehumidifiers during humid months.
Q: Do I need negative pressure for a small project? A: For small, well-contained areas, thorough sealing and a HEPA air scrubber may suffice. Negative pressure is recommended as scope grows or when sensitive occupants are present.
Q: Can I use my household vacuum? A: No. Use a HEPA-filtered vacuum designed to capture fine particles; household vacuums can redistribute dust and spores.
Q: When should I perform rebuild? A: Only after the area passes visual and moisture criteria and dust control is confirmed. Rushing rebuild risks trapping moisture and compromising finishes.
Q: How long should equipment run after cleaning? A: Allow several air changes within containment after final cleaning. Duration depends on room size and scrubber capacity.
Q: Is bleach necessary? A: Not usually. The foundation of remediation is removal, HEPA vacuuming, and detergent cleaning. Use antimicrobials where appropriate and per label instructions.
Q: What if odors persist after work? A: Reassess for hidden dampness, re-clean horizontal surfaces, verify HVAC filters are replaced, and stabilize humidity.
Keep Your Project on Track
Using a structured checklist turns a complex project into a series of manageable steps. By verifying moisture control, containment, removal, cleaning, drying, and clearance at each stage, you set yourself up for durable results and a healthier home. If you want expert oversight or hands-on assistance at any phase, choose a local team with proven mold remediation experience to streamline the process.
Restore Comfort in Your Bloomfield Home
Ready to put this checklist into action and reclaim a clean, healthy living space? Connect with trusted professionals who can plan, contain, clean, dry, and verify your project from start to finish through comprehensive mold remediation. With a clear roadmap, your Bloomfield home can stay resilient through every season.