
When mold shows up in your Bloomfield, New Jersey home, you want a clear picture of what happens next—and how long each step typically takes. A thoughtful timeline keeps your household organized, protects indoor air, and ensures the root cause of moisture is resolved so mold doesn’t return. Because Bloomfield homes range from historic builds with plaster and brick to newer construction with finished basements, timelines can vary. Still, the overall process follows consistent phases: discovery, inspection, planning, containment, removal and cleaning, drying, verification, and prevention. If you’re at the beginning of this journey, it can help to speak with a local expert in mold removal who can tailor the schedule to your home’s layout and materials.
Below is a practical, homeowner-friendly guide to the remediation process timeline. While every property is different, understanding each stage will help you plan for access, noise, and temporary room closures during the project.
Phase 1: Discovery and First Response
Most homeowners first notice a musty odor, dark staining on walls or ceilings, or persistent humidity in basements and bathrooms. Your first response should be to reduce moisture and avoid disturbing suspected mold. For example, use ventilation in bathrooms, shut off water to leaking fixtures, and move belongings away from damp walls. Avoid aggressive cleaning or demolition, which can spread spores without containment.
Next, contact a remediation professional to discuss symptoms, visible signs, and recent leaks. Provide photos when possible to help the team plan an effective on-site assessment.
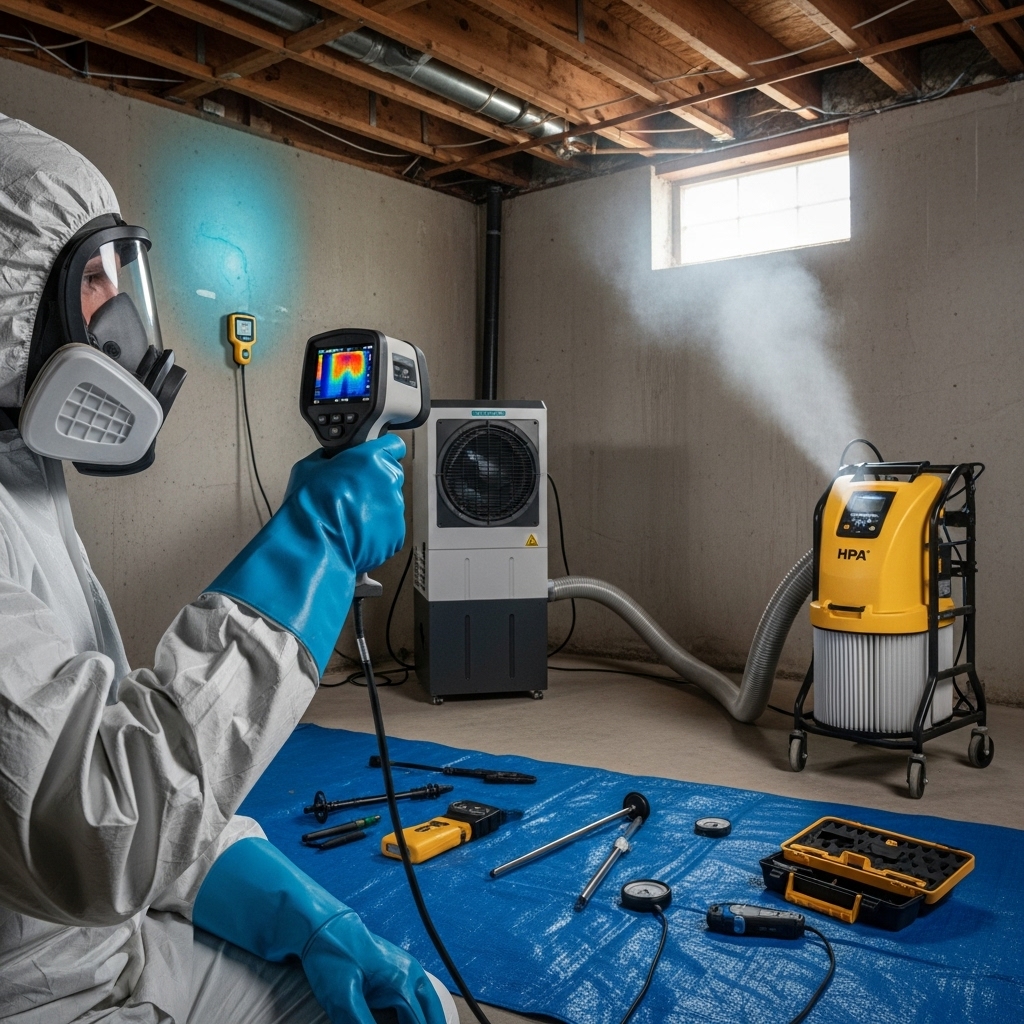
Phase 2: Inspection and Moisture Mapping
Inspection sets the pace for your project. A thorough assessment aims to identify not just visible growth but also the path of moisture. Expect your inspector to ask about the history of leaks, seasonality of problems (for example, summer humidity in basements), and any previous renovations. Tools like moisture meters and thermal cameras help locate damp pockets behind drywall or under flooring.
In Bloomfield, common sources include foundation seepage after heavy rain, attic condensation from insufficient ventilation, and small plumbing leaks hidden in cabinetry. The inspection should document findings and outline preliminary containment and removal strategies.
Phase 3: Planning and Preparing the Work Area
With inspection data in hand, the remediation team drafts a written plan. It will specify containment locations, negative air setup, removal versus cleaning decisions, and drying equipment. This is also when household logistics are coordinated: where equipment will be staged, which entrances will be used, and what rooms you’ll avoid during work. If your HVAC system serves affected areas, the plan will include protective measures or temporary adjustments to prevent cross-contamination.
Phase 4: Containment and Protection
Before any demolition or deep cleaning, the team builds containment using poly sheeting and establishes negative air pressure with HEPA air scrubbers. Entry points are sealed with zipper doors. Floors are protected, and air pathways are managed carefully to keep clean areas clean. This phase is crucial for safety and sets the stage for efficient removal and cleaning.
Phase 5: Source Control and Selective Removal
The moisture source must be addressed early—repairing plumbing, adjusting drainage, or improving ventilation. Once moisture is under control, the team proceeds with selective removal of materials that cannot be effectively cleaned. Common removals include saturated drywall, insulation, and carpet padding. Structural framing, subfloor, and concrete are typically cleaned in place using HEPA vacuuming and appropriate cleaning techniques. All debris is bagged or wrapped before leaving containment to prevent tracking particles through the home.
Phase 6: Detailed Cleaning and Air Filtration
After removal, detailed cleaning begins. The team HEPA-vacuums surfaces to capture settled spores and dust, then wipes or treats remaining contamination on structural elements. Air scrubbers continue running to capture airborne particles. Depending on the size of the project, the team may clean adjoining areas within containment to ensure that dust and spores don’t linger on undisturbed surfaces.
Phase 7: Drying and Monitoring
Even after removal and cleaning, materials must be dry before the space is closed up and rebuilt. Dehumidifiers and air movers may be used to bring moisture levels within acceptable ranges. Moisture readings are taken periodically to confirm progress. In basements, ongoing dehumidification might be recommended to maintain a healthier environment through the warmer months.
Phase 8: Post-Remediation Verification
Verification provides confidence that the area is clean, dry, and ready for reconstruction. A thorough visual check looks for dust, staining, and odors, and moisture measurements should confirm dryness. If testing is part of the plan, samples are collected after cleaning and drying, not before. Communication is key: ask for photos, readings, and a summary of steps taken so you can keep records for your home.
How Long Does Each Phase Take?
The duration of each phase varies by scope, accessibility, and material types. Discovery and initial calls can happen quickly, while inspection scheduling depends on availability. Containment and removal move faster when spaces are open and accessible; complex built-ins or tight crawl spaces add time. Drying depends on starting moisture content, ambient conditions, and the effectiveness of dehumidification. Your provider should give you a customized schedule and update you if hidden dampness is discovered during demolition.
Bloomfield-Specific Considerations
Local climate and construction styles influence timelines. In Bloomfield, common scenarios include basement humidity that stretches the drying phase in summer, or attic condensation that requires ventilation improvements before remediation is considered complete. Older plaster walls can conceal moisture that takes time to locate and address without unnecessary demolition. A local team familiar with neighborhood housing can anticipate these factors and plan accordingly.
Homeowner Preparation to Keep the Timeline Smooth
- Clear access: Move furniture and personal items away from affected walls when safe to do so.
- Coordinate schedules: Discuss work hours, parking, and entry points to reduce start-of-day delays.
- Communicate about pets and children: Plan routes that avoid containment zones.
- Provide history: Share prior leak events, past repairs, and seasonal patterns you’ve observed.
What Happens After Verification?
Once verification is complete and the area is dry, reconstruction can begin. This might include replacing drywall, insulation, trim, and flooring, as well as repainting. If ventilation or dehumidification improvements were recommended, implement them before or during rebuild to lock in the benefits of remediation. Maintenance habits—running bathroom exhaust fans longer, keeping gutters clear, extending downspouts, and monitoring humidity—help sustain healthy conditions.
Frequently Asked Questions
- Do I need mold testing to start? If mold is visible and the moisture source is known, many professionals focus on remediation first. Testing may be used for documentation or post-remediation verification.
- Can I live at home during remediation? Often yes, with containment and negative air in place. You’ll avoid the work area and follow safety guidance from the team.
- Will the timeline change if hidden mold is found? It can. If demolition reveals more moisture damage, the plan may expand to ensure thorough cleanup and proper drying.
- What about my HVAC system? If the system serves the affected area, it may be turned off temporarily or protected to prevent cross-contamination, and filters may be upgraded or replaced.
- How do I prevent regrowth? Control moisture with ventilation, dehumidification, quick leak repairs, and exterior maintenance like gutters and grading.
Signs You’re Working With a Thorough Team
- They discuss moisture sources first, not just surface cleaning.
- They build containment and use HEPA filtration before demolition.
- They document findings, moisture readings, and steps taken.
- They explain how to maintain dry conditions after the project.
Mid-Project Checkpoints You Can Expect
Good communication prevents surprises. Expect updates after containment is built, after demolition, and during drying. If changes are needed—such as expanding containment or adjusting dehumidification—your team should explain the reason and the impact on the schedule. When you understand the “why” behind each step, you can make informed decisions about access, moving belongings, and planning your week.
When to Bring in Help
If you’re dealing with visible mold on multiple walls, musty odors that persist after cleaning, or moisture problems in finished spaces, it’s wise to call a professional. Specialists who handle professional mold removal know how to build containment efficiently, remove contaminated materials safely, and pace the drying phase to keep your project on track.
Plan Your Path to a Clean, Dry Home
Mold remediation is a stepwise process that protects your family and your investment. With a clear timeline—from discovery to verification—you can reduce stress and ensure lasting results in your Bloomfield home. If you’re ready to move forward, schedule expert mold removal and start your path to a cleaner, healthier living space.