
New Jersey’s coastal moisture, shifting temperatures, and dense housing stock make mold a year-round concern for homeowners. Whether you are facing a small patch after a plumbing leak or a larger problem following a storm, understanding the full process helps you act quickly and safely. By learning the fundamentals of mold removal, you can protect your family’s health, safeguard your home’s structure, and reduce the chances of future outbreaks.
This guide walks New Jersey homeowners through each phase of a structured mold removal process, from preparation and containment to cleaning, drying, and prevention. It emphasizes safety, practical steps, and realistic expectations, so you know which tasks you can handle and when to call a qualified professional. Along the way, you will find checklists, mistakes to avoid, and FAQs tailored to common Garden State home layouts—basements, crawlspaces, attics, bathrooms, and kitchens.
Why Mold Thrives in New Jersey Homes
New Jersey’s climate encourages mold growth in multiple ways. Warm summers combined with high humidity create ideal conditions for spores to thrive. In colder months, condensation forms on windows, rim joists, and in under-insulated wall cavities, feeding latent moisture into porous materials. Older homes with mixed building materials can hide slow leaks behind tiled showers, under sinks, and around aging roofing. Even newly built homes can suffer when high-efficiency windows trap humidity without adequate ventilation.
Beyond climate, everyday household habits add moisture: drying laundry indoors, long hot showers without exhaust fans, and cooking without ventilation all elevate indoor humidity. Basements are especially vulnerable because of below-grade walls, seasonal groundwater pressure, and limited air movement. When relative humidity regularly exceeds 60%, many common molds can colonize drywall paper, wood framing, carpet backing, and dust.
Health and Safety Considerations
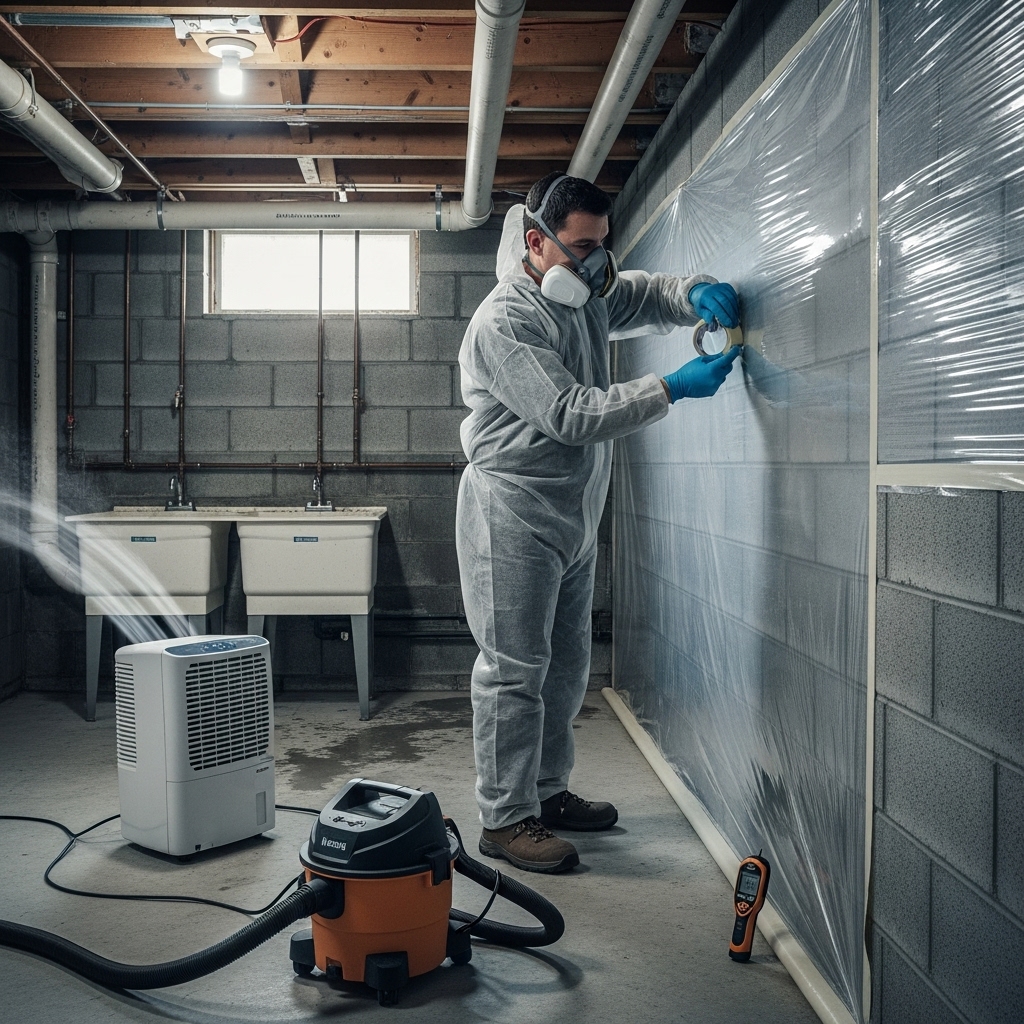
Before any removal effort, prioritize safety. Mold is not a single organism but a spectrum of species, and reactions vary by person. Individuals with asthma, allergies, or compromised immune systems may experience aggravated symptoms in moldy environments. Proper protection reduces exposure: a well-fitted respirator (rated N95 or better), protective eyewear, nitrile or latex gloves, and disposable coveralls help keep spores off your skin and out of your lungs.
Ensure that work areas are ventilated but contained. Uncontrolled airflow can spread spores to clean rooms. Always avoid dry-scrubbing mold, which releases spores into the air. Instead, methods that minimize aerosolization—damp wiping, HEPA vacuuming, and controlled removal—help keep contamination localized.
Preparation: Assess, Plan, and Set Up
Start with a thorough assessment of the affected areas. Identify the moisture source: is it a roof leak, plumbing failure, condensation, or groundwater seepage? Without addressing moisture, mold will return. Document the extent of visible growth and note any musty odors, staining, or soft spots in drywall or wood that indicate deeper issues.
Assemble supplies ahead of time. You will typically need protective gear, plastic sheeting, painter’s tape, HEPA vacuum, contractor bags, non-ammonia detergent, EPA-registered disinfectant, clean rags, and a dehumidifier. Set up a staging area for supplies and waste. Consider how you’ll move debris out of the home without crossing common living spaces.
Containment and Negative Pressure
Containment prevents cross-contamination. Seal off doors, vents, and openings with plastic sheeting. For moderate projects, a single-layer barrier may suffice; for larger areas, construct a simple zipper-door entry. If possible, create negative pressure in the work zone using a fan exhausting to the outdoors through a window. This technique draws air into the containment area and pushes potentially contaminated air outside, rather than allowing it to escape into hallways or bedrooms.
Turn off HVAC systems serving the area to avoid distributing spores through ductwork. Close or tape supply and return vents within the containment. Keep tools and materials inside the zone, and establish a clear donning and doffing routine for protective gear to prevent tracking debris into clean areas.
Step-by-Step Mold Removal Process
- Confirm the moisture source is addressed. Repair leaks, improve drainage, or correct ventilation before beginning removal. Otherwise, the problem will recur.
- Set safety protocols. Wear protective equipment, and ensure children, pets, and sensitive individuals are out of the work zone. Have a trash route planned.
- Remove porous materials with heavy contamination. Water-damaged drywall, ceiling tiles, insulation, and carpet pads often cannot be salvaged. Cut at least 12 inches beyond visible damage to reach clean material.
- Bag and seal debris immediately. Use heavy-duty contractor bags, double-bag if needed, and wipe the exterior before moving bags out of containment.
- HEPA vacuum all surfaces. This includes studs, subfloors, sheathing, and any nearby surfaces where dust may have settled. HEPA filtration captures fine particles and spores.
- Wet-clean non-porous and semi-porous materials. Use a non-ammonia detergent solution on tile, metal, sealed wood, and plastics. Avoid mixing chemicals and follow label directions.
- Disinfect cleaned areas. After detergent cleaning and rinse, apply an EPA-registered disinfectant. Contact time matters—keep surfaces visibly wet as directed.
- Address semi-porous framing. For stained studs or sheathing, consider gentle abrasion (sanding or media) under containment, followed by HEPA vacuuming and disinfection.
- Dry the space thoroughly. Run dehumidifiers and targeted air movement directed across damp materials, not directly at mold patches during active removal.
- Re-check moisture levels. A moisture meter helps confirm that wood and drywall are within normal ranges before closing walls or reinstalling finishes.
- Replace removed materials with mold-resilient choices. Use moisture-resistant drywall in bathrooms, install proper backer boards in showers, and select mold-resistant paints as appropriate.
- Verify success and document. Take photos, note moisture readings, and record the steps you followed. Documentation helps if you sell your home or need future reference.
Cleaning and Disinfection Details
Effective cleaning combines mechanical and chemical actions. Mechanical means physically removing growth and spores with HEPA vacuuming and wiping. Chemical means using an appropriate cleaner or disinfectant to reduce remaining organisms. Always clean first, then disinfect; organic debris reduces disinfectant effectiveness. Avoid bleach on porous materials—while it may lighten stains, it can leave water behind and does not reliably penetrate porous substrates.
If you reach a point where the scope feels beyond your capacity—for instance, extensive growth across multiple rooms, or contamination in HVAC systems—consider professional help. Mid-project consultation can clarify your next steps and prevent rework. In many cases, homeowners perform demolition and drying, then bring in specialists for clearance testing or finishing steps. When evaluating pros, ask about containment practice, HEPA standards, and documentation methods. Midway through complex jobs, some homeowners schedule professional mold removal to ensure a durable result.
Drying and Humidity Control
Drying is the linchpin of a successful outcome. Even after visible mold is removed, lingering moisture invites regrowth. Use a quality dehumidifier sized for the room or basement volume, and run it continuously until wood and drywall reach safe moisture levels. Target 30–50% indoor relative humidity. Encourage airflow across surfaces with fans, but avoid blasting air at visible mold during removal; do so only after cleaning to speed drying of damp surfaces.
Monitor humidity with an inexpensive hygrometer. In basements, consider sealing wall penetrations, improving exterior grading and gutters, and installing a sump system if groundwater is a recurring issue. Bathrooms benefit from high-capacity exhaust fans ducted outdoors—run them during showers and for at least 20 minutes afterward. Kitchens need range hoods vented outside, not recirculating.
Verification and Prevention
Once cleaning and drying are complete, verify success. Look for the absence of musty odors, visible growth, and excessive dust. Use a moisture meter to confirm materials have reached normal readings. If you previously had a significant problem, periodic spot-checks—especially in humid months—help catch issues early.
Prevention is a repeatable routine: maintain indoor humidity below 50%, fix leaks immediately, insulate cold surfaces to reduce condensation, and keep gutters clear. In basements, use closed-lid storage bins, elevate boxes off floors, and avoid wall-to-wall carpet. In bathrooms and kitchens, wipe condensation, squeegee shower walls, and clean exhaust grilles regularly. In attics, ensure adequate soffit and ridge ventilation and keep insulation from blocking airflow.
Common Mistakes to Avoid
- Skipping containment and spreading contamination to clean rooms.
- Cleaning without fixing the underlying moisture source.
- Relying on fragrances to mask odors rather than addressing mold.
- Using harsh chemicals without proper ventilation or mixing incompatible products.
- Closing walls before materials reach safe moisture targets.
- Ignoring hidden spaces—behind baseboards, under vinyl flooring, or inside cabinets.
- Running HVAC during removal, distributing spores through ducts.
Room-by-Room Considerations
Basements: Seal cracks, manage groundwater, and add a permanently plumbed dehumidifier. If you frequently smell mustiness after rain, inspect foundation walls, sill plates, and rim joists. Consider semi-permeable wall systems that allow drying rather than trapping moisture behind vapor-impermeable finishes.
Bathrooms: Upgrade exhaust fans to higher CFM ratings and use timers. Replace deteriorated caulk, choose cement board for wet walls, and apply mold-resistant coatings where appropriate. Keep shower doors open after use to encourage drying.
Kitchens: Vent range hoods outdoors and control steam during cooking. Check sink traps and supply lines for slow leaks, and monitor dishwasher connections. Clean under refrigerators where coils and drip pans collect dust and moisture.
Attics: Look for roof leaks, bathroom fan terminations into the attic, and blocked soffits. Maintain balanced intake and exhaust ventilation. Correct insulation gaps that create cold spots and condensation in winter.
Insurance and Documentation Notes
Coverage for mold varies. Even when insurance does not cover removal, documenting the cause and your remediation steps can help with future claims. Photograph the source of water, the affected areas before and after, and save receipts for materials used in drying and repairs. Keep a log of humidity readings and moisture meter results.
Frequently Asked Questions
How do I know when I need professional help? If the affected area spans multiple rooms, involves HVAC systems, or you notice recurring growth despite your efforts, consult a qualified specialist. Safety concerns, such as individuals with severe allergies or respiratory conditions, also tip the scale toward professional handling.
Is bleach the best cleaner for mold? Bleach may lighten stains but often fails to penetrate porous materials and can add moisture. A better approach is physical removal, HEPA vacuuming, detergent cleaning, and then disinfection with an appropriate product per label directions.
Can I paint over mold? Painting over active growth traps moisture and can cause bubbling, peeling, and return of stains. Only paint after proper removal, thorough drying, and confirmation that moisture is under control. Use primers designed for stain blocking on cleaned, dry surfaces.
Will a dehumidifier alone solve mold problems? Dehumidifiers manage airborne moisture but do not fix leaks, condensation, or existing growth. They are part of a comprehensive strategy that includes repairs, ventilation, cleaning, and verification.
What humidity level should I target? Aim for 30–50% indoor relative humidity. In summer, this usually requires dehumidification; in winter, it may require ventilation and correcting cold spots to prevent condensation.
Ready to Protect Your New Jersey Home?
If you suspect mold or have recently experienced a leak, take action now. Start with containment, remove damaged materials, and dry thoroughly. For larger projects or lingering concerns, partner with local experts who can guide testing, removal, and prevention strategies tailored to your home. When you need proven help, reach out for trusted mold removal support and take back a cleaner, healthier living space.