
Mold Remediation Inspection Guide for Bloomfield, New Jersey
A mold remediation inspection is the foundation of a successful cleanup. In Bloomfield, where a mix of older homes, renovated multifamily units, and seasonal humidity create ideal conditions for hidden moisture, a careful inspection can prevent small problems from escalating. This guide explains how inspections work, what tools professionals use, how to prepare your home, and what to expect in the report. Whether you are a homeowner, landlord, or property manager, understanding the process ensures a safer, more efficient remediation. If you are just starting your research, it can help to review an overview of professional mold remediation so you can connect inspection findings to the steps that follow.
Inspections are not solely about spotting visible growth. The real objective is to understand moisture dynamics: where water enters, how it moves, and why it remains. A methodical inspection maps these pathways and informs containment boundaries, removal strategies, and drying targets. In a climate like northern New Jersey, the interplay between outdoor humidity and indoor temperature can lead to condensation and subtle, recurring dampness—making precision vital.
Before the Inspection: Preparation Tips
Preparation saves time and provides clearer findings. Before the inspector arrives, consider the following steps to help them access critical areas and gather accurate data:
- Clear pathways to basements, utility rooms, and attics
- Remove items stacked against foundation walls or sump pits
- Unlock mechanical rooms and ensure access to the HVAC air handler
- List recent leaks, appliance failures, roof issues, or musty odors by location
- Note any symptoms that improve when occupants are away from the building
It is useful to share seasonal patterns you have noticed, such as damp corners after a nor’easter or condensation on basement windows in midsummer. Local details offer clues that lead to accurate moisture diagnosis.
Tools and Techniques Inspectors Use
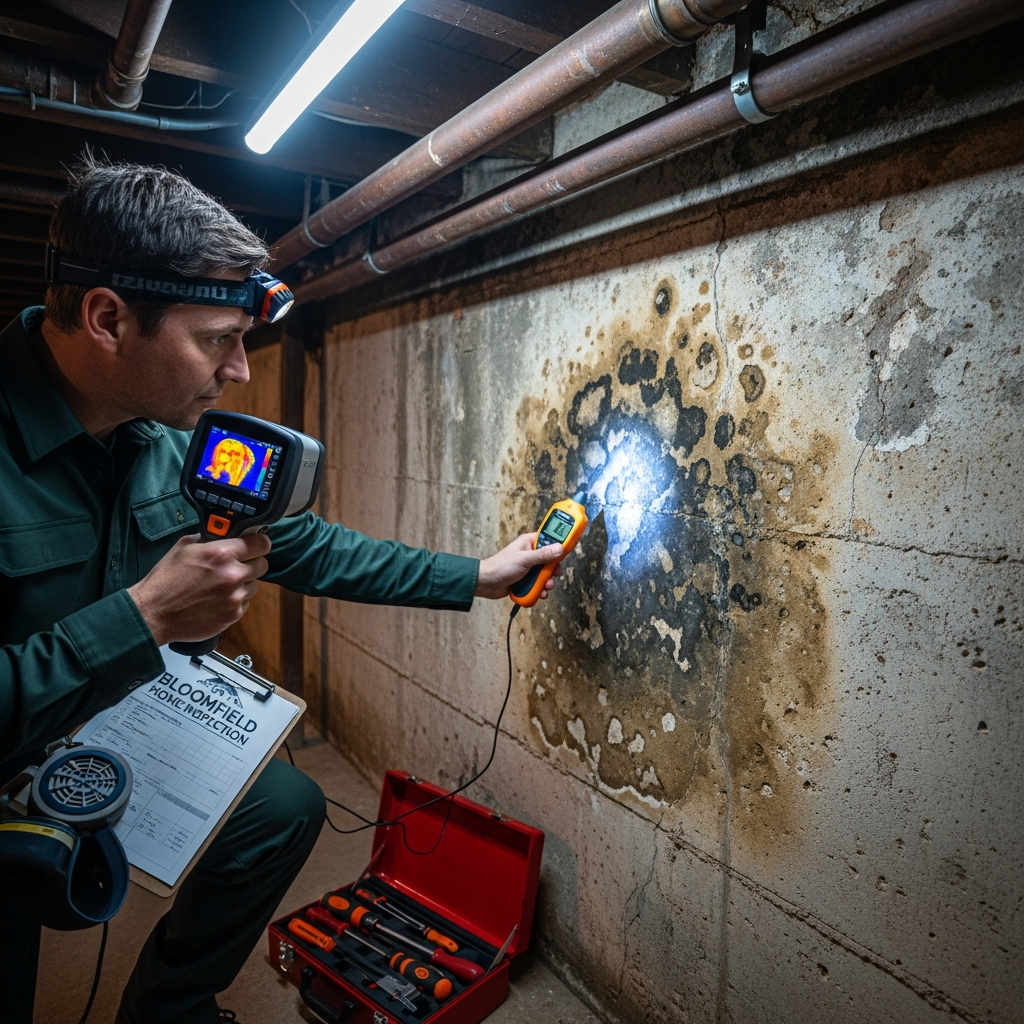
Professional inspectors rely on a blend of observational skills and instruments to pinpoint problems. Common tools include:
- Moisture meters for drywall, wood, and concrete
- Thermal imaging to identify temperature differentials that suggest hidden moisture
- Hygrometers to measure relative humidity indoors
- Inspection cameras for looking inside wall cavities
- HEPA vacuums and wipes for surface sampling if needed
Not every inspection requires sampling. Often, visual evidence and moisture readings are enough to define the scope and plan remediation. Sampling is most productive when it answers a specific question—such as verifying whether a stain is mold or determining if a cleaned area remains contaminated.
Common Bloomfield Trouble Spots
Bloomfield’s architecture and climate yield consistent patterns that inspectors watch for:
- Basements with paneling over masonry, which can trap moisture
- Attics with inadequate ventilation or bathroom fans venting into the attic
- Window frames in older homes that collect condensation in winter
- HVAC condensate leaks and clogged drain lines
- Behind-kitchen or behind-bathroom wall cavities with slow plumbing leaks
Understanding these patterns helps define where to open walls, how to place containment, and what materials are likely to require removal versus cleaning.
The Inspection Sequence
A thorough inspection proceeds in a logical order:
- Interview and history: The inspector asks about leaks, odors, renovations, and previous water damage.
- Exterior review: Gutters, grading, and siding are checked for pathways that allow water to enter.
- Interior walkthrough: Visible staining, odors, and condensation points are noted.
- Moisture mapping: Readings identify wet materials and define the likely boundaries of hidden growth.
- HVAC check: Filters, coils, and drain lines are reviewed to ensure the system does not spread contaminants.
- Documentation: Photos and notes capture conditions for the written report.
- Optional sampling: When justified, targeted sampling validates assumptions or verifies post-cleaning results.
This sequence ensures that the final remediation plan addresses not just the visible mold but also the moisture that feeds it.
Interpreting Your Inspection Report
A strong report links observations to actions. Expect a summary of affected areas, probable moisture sources, recommended containment boundaries, removal and cleaning steps, drying targets, and prevention recommendations. Visual documentation may include photos or diagrams showing where moisture readings were elevated and where materials should be removed versus cleaned. The report should be specific enough that you or a third-party contractor could follow it as a blueprint for remediation.
Clarity in the report is your ally. If any recommendation is unclear, ask for examples or photos from similar Bloomfield homes. Make sure the report explains how the moisture source will be addressed—repairing a leak, adjusting ventilation, or improving drainage—so that remediation results remain durable.
How Inspections Inform Containment and Removal
Containment is as important as removal. An accurate inspection determines where to place barriers and negative air machines to protect clean rooms. For example, if moisture readings show dampness spreading laterally across drywall, containment may need to extend beyond visible stains. If air movement could carry spores into return ducts, the plan should include protecting HVAC systems and sealing vents in the work zone. These details reduce the risk of cross-contamination and speed the overall project.
When and Why Sampling Might Be Used
Sampling does not replace moisture diagnosis. When used, it answers targeted questions. Examples include verifying whether a discoloration is mold, checking cleanliness after remediation, or investigating occupant symptoms when visual evidence is limited. Any sampling should be interpreted alongside on-site conditions; lab results mean little without the context of moisture sources and building dynamics. A thoughtful inspector prioritizes actions that solve the problem, not just numbers on a page.
Homeowner Role During and After Inspection
Your input is essential. Share a timeline of past issues, photographs of previous leaks, and maintenance records for gutters, roofs, or HVAC systems. During the inspection, point out odor hotspots or rooms that feel humid. After receiving the report, review it carefully, ask clarifying questions, and request a concise, written scope of work based on its recommendations. Your engagement helps ensure that the remediation directly addresses your home’s needs.
Coordinating with Contractors
Many homeowners choose to have the inspector and remediation contractor communicate directly. This collaboration turns findings into an actionable plan, from containment placement to drying targets. If repairs are needed—such as fixing plumbing, roof flashing, or ventilation—make sure responsibilities and timelines are clear. Good coordination minimizes downtime and keeps the project moving smoothly.
Frequently Asked Questions
Q: Do I need to test for mold before remediation? A: Often no. Visual inspection and moisture mapping provide clear direction. Testing is most useful for specific questions or verifying cleanliness after work is completed.
Q: How long does a typical inspection take? A: Most residential inspections take a few hours, depending on the size of the home and the complexity of the issues.
Q: Will the inspection damage my home? A: Inspectors may recommend limited, targeted openings to confirm hidden moisture. Any openings are typically planned where repairs will occur during remediation.
Q: Can I perform my own inspection? A: You can identify obvious signs and track moisture with basic tools, but a professional brings specialized instruments, experience, and an unbiased perspective.
Q: What should I do if the report findings are extensive? A: Do not panic. A clear report is the first step toward resolution. Prioritize moisture source correction, then schedule remediation in phases if necessary.
Q: Will insurance cover inspection or remediation? A: Policies vary. Coverage often depends on the cause and timing of water damage. Document everything and contact your provider to discuss specifics.
Q: How do I know the inspection was thorough? A: Look for a detailed report with photos, moisture readings, and clear, step-by-step recommendations tied to observed conditions.
Q: What happens after remediation is complete? A: Maintain healthy humidity levels, verify proper ventilation, and monitor past problem areas. Preventive habits protect your investment.
From Findings to Action
An effective mold remediation inspection turns concern into a clear plan. With a thorough report in hand, you can schedule containment, removal, cleaning, and drying steps that directly address your home’s conditions. As you evaluate next steps, it is helpful to compare your plan to trusted guidance on mold remediation so you understand how inspection results translate into fieldwork. With the right preparation and professional support, Bloomfield homeowners can restore healthy indoor environments and keep them that way.