
Mold Remediation Process Timeline in Bloomfield, New Jersey
Understanding the timeline of a mold remediation project helps you plan your days, coordinate with family or tenants, and set realistic expectations for returning to normal. Bloomfield homeowners often face moisture challenges tied to humid summers, finished basements, and older ventilation systems. This guide breaks down each phase of a typical remediation timeline—from the first phone call to final verification—so you know what happens when and why. If you are early in your research, it helps to review what comprehensive mold remediation entails, then use the schedule below to gauge how long each step usually takes.
No two homes are identical. Age, materials, layout, and the source of moisture all shape the schedule. However, the overall flow is consistent: assess, contain, remove, clean, dry, verify, and prevent. When you understand how these parts fit together, you can better communicate with your contractor, prepare your home, and avoid surprises.
Phase 1: Initial Contact and Triage
Timeline: Same day to 48 hours. The process starts with a conversation. You will be asked about musty odors, visible staining, recent leaks, health concerns, and past water events. Providing clear details and photos speeds evaluation and prioritization. If there is active water intrusion, the first goal is to stop it—turn off supply lines, cover roof openings, or clear clogged drains. Good contractors use this call to flag safety issues, outline immediate steps you can take, and schedule the on-site inspection.
Phase 2: On-Site Inspection and Moisture Mapping
Timeline: 2–4 hours, typically scheduled within 24–72 hours. The inspector documents affected areas, takes moisture readings, and determines likely sources. Expect them to check basements, attics, bathrooms, kitchens, and HVAC components. They may recommend limited openings to confirm hidden moisture. A written summary follows, defining containment zones, removal needs, and drying targets. This report becomes the blueprint for remediation.
Phase 3: Planning, Protection, and Logistics
Timeline: 1–2 days. Based on the inspection, the contractor finalizes a scope of work, orders materials if needed, and coordinates any supporting trades for leak repairs or ventilation adjustments. You will receive instructions about clearing access, protecting valuables, and arranging alternate pathways through your home during the work. Clear planning minimizes disruption and ensures technicians can move efficiently once containment is up.
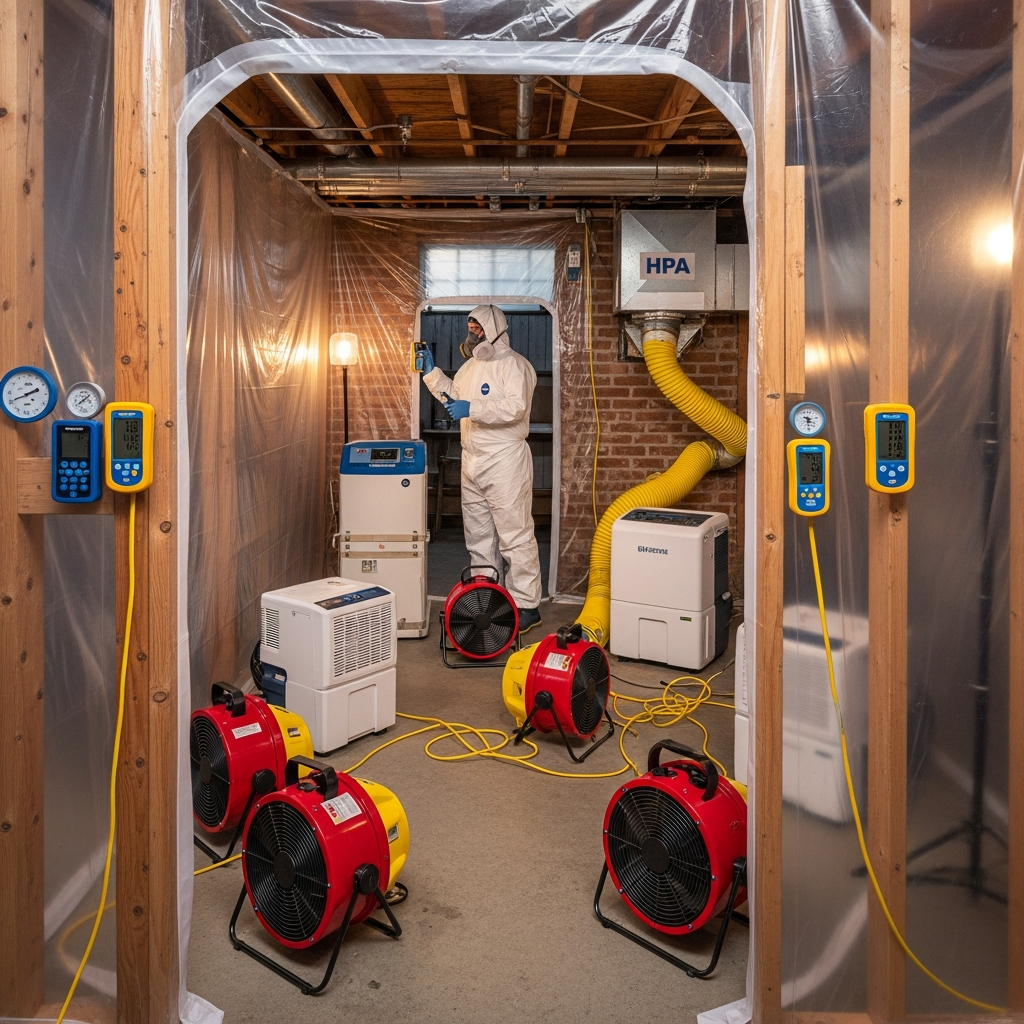
Phase 4: Containment Setup and Site Safety
Timeline: Half day to a full day. Technicians install plastic barriers, zipper doors, and negative air machines with HEPA filtration. Vents are sealed in the work zone, and pathways are marked. Site safety measures—including personal protective equipment and debris handling—are put in place. A careful setup prevents cross-contamination and allows the rest of the home to function while work proceeds.
Phase 5: Removal of Porous Materials
Timeline: 1–3 days, depending on scope. Heavily affected drywall, insulation, carpet, and padding are carefully removed and bagged. Removal often reveals hidden dampness or structural issues that were not visible earlier, especially in older Bloomfield homes. The crew documents progress with photos and adjusts the scope if necessary. You should receive updates that explain any changes and the reasons behind them.
Phase 6: Detail Cleaning and HEPA Vacuuming
Timeline: 1–2 days. After removal, the team performs meticulous cleaning of remaining surfaces, including HEPA vacuuming and wipe-downs to capture fine particulates and spores. Attention to detail here pays dividends. Proper cleaning sets the stage for drying and helps ensure that when the space is closed back up with new finishes, it remains healthy.
Phase 7: Drying and Humidity Control
Timeline: 2–5 days, sometimes longer for dense materials. Air movers and dehumidifiers are placed to reduce humidity and bring materials to target moisture content. Technicians monitor progress daily, adjusting equipment as needed. You may hear equipment noise during this period and feel increased airflow in the containment zone. Patience is important—the goal is not just to dry the surface but also the interior of studs, subflooring, and other structural elements.
Phase 8: Source Correction
Timeline: Varies by repair. Leak repairs, gutter adjustments, foundation sealing, or ventilation improvements happen during or immediately after drying. When coordinated well, these repairs fit seamlessly into the timeline and ensure the root cause is resolved so mold does not return. Ask your contractor to document the fix with photos and a brief summary.
Phase 9: Verification and Turnover
Timeline: Several hours to a day. Once the area is clean and dry, the contractor verifies conditions meet the defined criteria. This includes moisture readings and a final walkthrough of the containment zone. If sampling is part of the plan, it may occur now to confirm cleanliness. After verification, the site is turned over for any restoration work such as drywall replacement or painting.
Phase 10: Restoration and Finishing Touches
Timeline: 1–5 days, scope dependent. Restoration follows remediation and is usually handled by the same contractor or a qualified trade partner. Because remediation has already addressed moisture and cleanliness, restoration can proceed with confidence. Ask for guidance on primers and finishes appropriate for the space, and confirm any waiting periods before repainting to avoid trapping residual moisture.
What Can Accelerate or Delay the Timeline
Several factors influence speed. The size of the affected area, the number of rooms involved, the presence of complex materials, and the difficulty of repairs all matter. Weather can also play a role; periods of high outdoor humidity may slow drying, while low outdoor humidity can speed it up. Clear communication—daily updates, prompt answers to questions, and documented moisture readings—keeps the project on track and gives you confidence in each decision.
How to Prepare Your Home for Each Phase
Simple steps streamline the work and reduce disruption:
- Before inspection: Clear access to basements, attics, and mechanical rooms
- Before containment: Relocate delicate items and plan alternate routes through the home
- During drying: Keep doors to the containment zone closed and avoid adjusting equipment
- Before restoration: Confirm paint and material choices that align with moisture control goals
As you plan, review trusted information about mold remediation to set expectations and understand why each step takes the time it does. Informed homeowners are better equipped to ask timely questions and collaborate with the crew.
Frequently Asked Questions
Q: Can remediation be completed in a single day? A: Small projects might finish quickly, but most require multiple days to allow for careful removal, cleaning, and thorough drying.
Q: Do I need to leave my home during containment? A: Often no. Containment and negative air protect the rest of the home. Sensitive individuals may prefer temporary relocation during the noisiest phases.
Q: What happens if rain arrives during the project? A: Crews adjust equipment and verify that water is not re-entering. Drying may take longer if humidity spikes, but monitoring ensures progress continues.
Q: Is sampling required at the end? A: It depends on the scope, project goals, and any third-party requirements. Many projects rely on visual verification and moisture metrics.
Q: When can I repaint or reinstall finishes? A: After verification and once materials are at or below target moisture levels. Rushing can trap moisture and risk future problems.
Q: How will I know the area is safe? A: A combination of clean visual conditions, documented moisture readings, and, where applicable, post-remediation sampling provides confidence.
Q: What if mold returns months later? A: Recurrence usually indicates an unresolved moisture source. Contact your contractor to reassess and address the root cause.
Q: Can I run my HVAC during remediation? A: Your contractor will advise. Registers in the containment zone are typically sealed to prevent distribution of particulates.
Stay on Schedule with Clear Communication
A predictable timeline is built on preparation, process, and responsiveness. By understanding each phase, you can coordinate your household, ask focused questions, and ensure moisture issues are truly resolved. Choose a contractor who documents progress, explains decisions, and provides daily updates. With the right plan and partnership, you will move efficiently from first call to final verification—and return to a clean, dry home with confidence.