
Introduction: Safety-First Mold Strategies for Bloomfield Homes
When you notice a musty odor, discoloration on drywall, or persistent moisture in a basement or bathroom, you may be dealing with mold in your Bloomfield, New Jersey home. Taking swift, careful action can protect your health and your property, but the first step is understanding that safety must drive every decision you make. Residents in Essex County grapple with humid summers, freeze–thaw cycles, and frequent rain that can push moisture into older basements and behind interior finishes. This guide explains how to plan and perform mold removal in a way that prioritizes well-being, clarifies proper techniques, and helps prevent recurrence in Bloomfield’s unique climate.
While not every situation requires professional remediation, homeowners should approach any growth larger than a few square feet, any contamination caused by Category 3 water (such as sewage), or any area involving medically vulnerable occupants with caution. In these cases, bringing in a qualified local remediator is often the wisest course. For smaller problems linked to minor leaks or intermittent humidity, this detailed, safety-oriented walkthrough will help you decide how to proceed. By planning carefully, wearing the right protective gear, setting up basic containment, and managing moisture, you can address many small to moderate problems while keeping your family safe.
Know Your Enemy: How Mold Thrives in Bloomfield, NJ
Mold is a natural part of the environment, but it becomes a problem indoors when moisture and organic surfaces align. In Bloomfield’s housing stock—ranging from pre-war colonials to post-war ranches—unvented bathrooms, older single-pane windows, and below-grade masonry walls can hold moisture long enough for spores to anchor on drywall paper, wood framing, subfloors, or insulation facings. Warm, stagnant air after summer thunderstorms and insufficient ventilation in finished basements give certain species the perfect foothold. Recognizing that moisture control is the foundation of any solution will keep you focused on the root cause rather than only the visible growth.
Common triggers include slow plumbing leaks in kitchen or bath cabinets, ice damming around roof eaves during winter, clogged gutters forcing water into walls, high indoor relative humidity from unvented dryers, and condensation on cool basement surfaces. If you simply clean the stain without eliminating the moisture source, the problem will return. That is why a safe plan begins with an honest assessment: where did the water come from, how long has it been present, and what materials were affected?
Health and Safety: Personal Protective Equipment and Occupant Protection
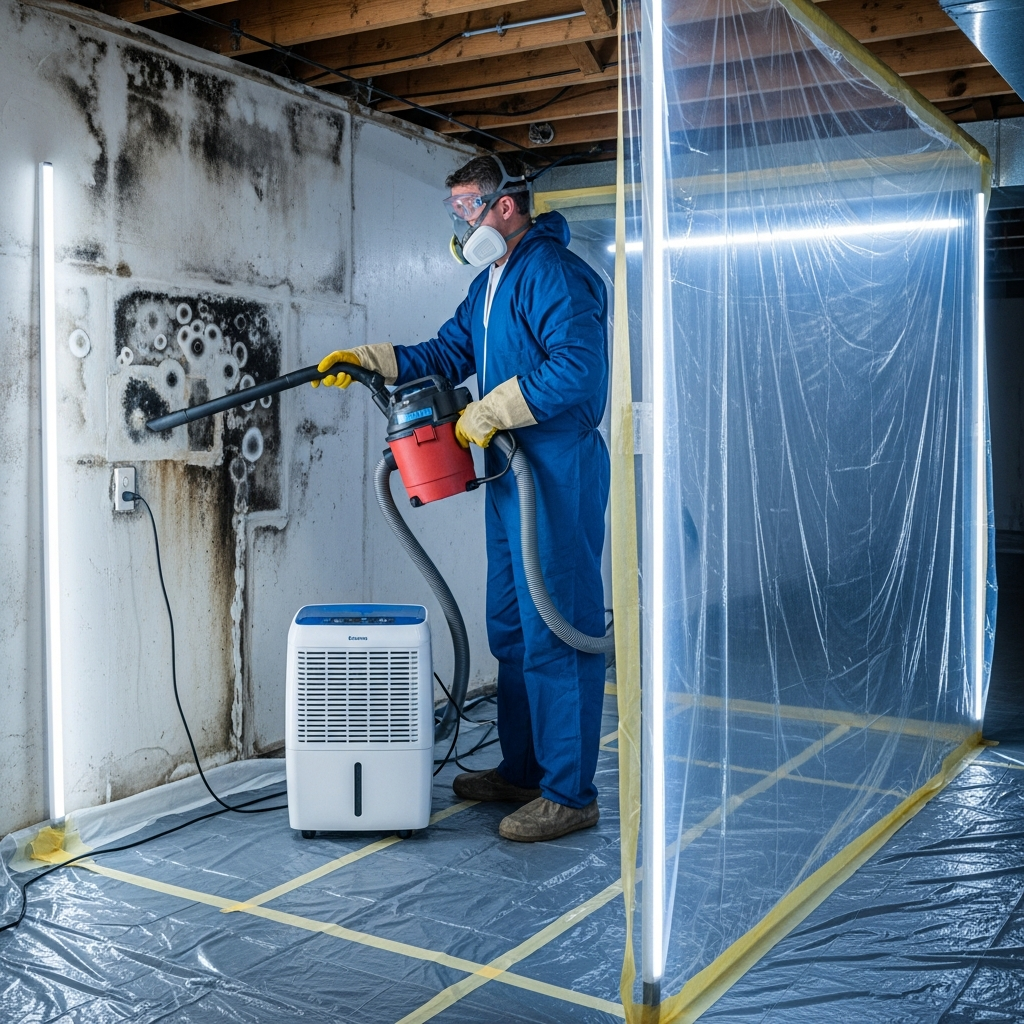
Before you disturb even a small patch of mold, protect your lungs, eyes, and skin. For most small projects, non-vented goggles, nitrile or latex gloves, and a properly fitted N95 or better respirator are minimum safeguards. If you are tackling more extensive work, disposable coveralls with booties and a half-face respirator with P100 filters provide a stronger barrier against spores and fine dust released during cleaning and demolition. Always confirm that your respirator fits well—facial hair can compromise the seal. Keep children, elderly family members, and anyone with asthma or compromised immunity away from the work zone until cleaning, ventilation, and surface drying are complete.
Think beyond the worker’s gear: protect the rest of the home. Close doors to adjacent rooms, turn off forced-air HVAC systems serving the affected area to prevent distributing spores through ducts, and consider taping over supply and return vents while work occurs. Have sealed trash bags ready before you begin, and position a portable HEPA air purifier close enough to capture disturbed particles but not so close that it interferes with your movement or spreads dust. Good safety is organized safety: lay out tools, cleaning solutions, and waste bags so you minimize unnecessary trips in and out of the work zone.
Source Discovery: Inspection and Moisture Diagnosis
Effective remediation starts with finding moisture. In Bloomfield, exterior factors like missing downspout extensions and negative grading can push water toward foundations. Indoors, look for sweating copper pipes, deteriorated wax rings under toilets, and hairline cracks around tub enclosures. Use a non-invasive moisture meter to compare suspect surfaces to known dry references. If you don’t own one, you can still look for telltale signs: peeling paint, soft baseboards, bubbling vinyl flooring, and musty odors concentrated in corners or behind furniture. Attics deserve attention too—stains around roof penetrations, undersized or blocked soffit vents, and bathroom fans that terminate into attic cavities rather than outdoors can drive hidden growth on roof sheathing.
Once you identify the probable moisture source, stop it first. Shut off water to leaking fixtures, schedule gutter cleaning, add splash blocks or downspout extensions, re-caulk around tub surrounds, or run a dehumidifier to bring relative humidity under 50 percent. Do not start demolition or aggressive cleaning until you are confident the wetting event has ceased and surfaces are on a drying trajectory. Otherwise, you risk repeating the cycle and lengthening the disruption to your household.
Containment: Keeping Spores from Spreading
Containment minimizes cross-contamination. Even with small jobs, close the door, seal gaps around it with painter’s tape, and place a tacky mat or damp towel at the threshold to capture dust from footwear. For larger or dustier tasks, construct a simple plastic barrier from floor to ceiling using painter’s tape or poles, leaving a zipper or folded seam for entry. Negative air—exhausting air from the work zone to the outdoors through a window using a fan and pre-filter—helps keep particles from drifting to clean spaces. Turn off nearby HVAC zones, and if possible, seal nearby supply and return registers during work. The aim is simple: create a one-way flow that retains dust and spores until they can be captured and removed.
Keep your tools inside the containment and wipe them before removal. Bag waste in heavy-duty contractor bags, twist and tape or tie them before carrying out, and avoid dragging debris along hallways. If you used disposable protective gear, doff it methodically to avoid contaminating yourself or clean areas—gloves last, then hand hygiene immediately afterward. This level of discipline might feel excessive, but it dramatically reduces cleanup time elsewhere in the home.
Removal Techniques: Porous, Semi-Porous, and Non-Porous Materials
The correct technique depends on the material. For non-porous and many semi-porous surfaces—tile, sealed concrete, finished metal, and some painted wood—thorough cleaning followed by surface disinfection and drying is typically effective. Start with HEPA vacuuming to capture loose fragments and settled spores. Next, apply a detergent solution and agitate gently with a non-shedding pad or brush. Rinse with clean water, and dry quickly with fans or dehumidification. Avoid mixing chemicals, and never use harsh agents in poorly ventilated areas without appropriate respiratory protection. Painted drywall with surface-level growth sometimes responds to careful cleaning, but if the paper face is compromised or the growth penetrates, replacement of the affected section is usually the safer, longer-term fix.
Porous building materials—unpainted drywall, wet insulation, carpet pad, and ceiling tiles—are difficult to clean thoroughly because contamination can extend into tiny voids. Remove and discard materials that remain stained or odorous after cleaning, or that were wet for longer than 24–48 hours. Cut drywall at least a few inches beyond visible damage to ensure you capture hidden growth. For structural lumber, subfloors, and roof sheathing, mechanical cleaning (HEPA vacuuming, gentle scraping, and damp wiping) followed by thorough drying is standard, with sanding reserved for stubborn staining after you confirm structural integrity. In all cases, the final step is to confirm dryness with a meter or at least with consistent conditions over several days, because reinstalling finishes over damp substrates invites a quick relapse.
Cleaning Agents, HEPA Filtration, and Middle-of-Project Checkpoints
In Bloomfield’s older basements, efflorescence and masonry dust can complicate cleanup. Begin with HEPA vacuuming to remove fine particulates that can shield colonies from cleaning solutions. Use a mild detergent solution for most surfaces; stronger biocides are not necessarily better and can pose respiratory hazards if misused. Work methodically from the top down and from the cleanest to the dirtiest areas, replacing cloths or pads frequently to avoid re-depositing spores. Mid-project, pause to reassess: Is the source controlled? Are humidity levels consistently below 50 percent? Is dust adequately captured by HEPA filtration? If the answer to any of these is no, correct it before proceeding. If you pivot to professional help midstream, you’ll have a cleaner, safer space for a pro team to complete the remaining mold removal steps.
Drying and Verification: When Is the Job Done?
Thorough drying is the linchpin of success. Run a dehumidifier sized for the space, especially in basements and garden-level apartments common in Bloomfield. Aim for steady-state humidity below 50 percent and surface moisture readings that match adjacent dry areas. Keep air moving, but avoid blasting fans directly at visibly moldy surfaces before they are vacuumed and cleaned, as this can aerosolize fragments. After cleaning and drying, perform a white-glove inspection under bright light. Look for dust on horizontal ledges, residual staining, or musty odors. A successful project ends with clean surfaces, neutral smells, stabilized humidity, and no active leaks or condensation risks.
Prevention for Bloomfield Homes: Design, Habits, and Maintenance
Prevention means designing out moisture and maintaining vigilance. Extend downspouts six feet or more from foundations, maintain positive grading, and keep gutters clear, especially during leaf-heavy autumns. In bathrooms, run exhaust fans that vent outdoors for 20–30 minutes after showering, and keep shower curtains or doors open afterward to speed drying. In kitchens, use range hoods while boiling or dishwashing. Insulate cold water pipes to reduce condensation, and consider adding vapor barriers and rigid foam on cold basement walls before finishing. For laundry, ensure dryers vent outdoors and lint hoses are not crushed. Seasonal habits matter too: in summer, set air conditioners to control humidity rather than just temperature; in winter, watch for condensation on windows that signals the indoor air is too moist.
Common Mistakes to Avoid
Rushing is the root of many failures. Skipping source control, over-relying on strong chemicals instead of thorough cleaning, omitting containment, and reinstalling finishes over damp framing are classic errors. Another frequent misstep is using standard shop vacuums that lack HEPA filtration; these can blast fine spores back into the room. Finally, masking odors with fragrances or ozone generators does not solve the problem and may add health risks. Good remediation is patient, methodical, and driven by moisture metrics rather than the clock.
When to Call a Professional
While Bloomfield homeowners can handle small, well-defined jobs, call a professional if the contaminated area is extensive, if sewage or floodwater touched materials, if the home contains occupants with respiratory vulnerabilities, or if the moisture source involves complex building assemblies like flat roofs or hidden plumbing stacks. Certified remediators bring negative air machines, full containment systems, HEPA-filtered tools, and the experience to solve underlying building science issues. A reputable pro will also communicate clearly about scope, safety, and post-remediation verification.
Frequently Asked Questions
Q: How do I know if I should test for mold? A: Testing is most useful when the source is unclear or when you need documentation after remediation. If you see visible growth and know the moisture source, fix the source and remove the growth. In many homeowner scenarios, resources are better spent on finding and eliminating moisture than on sampling.
Q: Can I paint over mold with a stain-blocking primer? A: No. Paint may hide stains briefly, but if the substrate is damp or contaminated, growth will return and can push the coating off the surface. Clean thoroughly, remove porous materials that cannot be salvaged, dry the area to normal moisture levels, and only then repaint.
Q: Are bleach solutions the best choice? A: Bleach is not automatically the best option and can be hazardous in enclosed spaces or on porous materials where it may not penetrate effectively. Detergent cleaning, HEPA vacuuming, and thorough drying are the backbone strategies. If you use any disinfectant, follow label directions, ensure ventilation, and never mix chemicals.
Q: How long should I run a dehumidifier after remediation? A: Run it until humidity stabilizes below approximately 50 percent for several consecutive days and there are no signs of condensation. In Bloomfield basements, seasonal operation during humid months is often beneficial, especially after heavy rains.
Q: Do I need to replace all insulation after a leak? A: If fiberglass batt insulation got wet and remained so more than 24–48 hours, or if it smells musty, replacement is prudent. Rigid foam and closed-cell spray foam often fare better if water exposure was brief, but always verify the surrounding framing has dried before closing walls.
Q: Will an air purifier solve my mold problem? A: A HEPA purifier can reduce airborne particles during and after cleanup, but it cannot remove growth on surfaces or address the moisture source. Consider purifiers a supplement to—not a substitute for—source control, cleaning, and drying.
Q: Can I keep the HVAC running during remediation? A: It is safer to shut down or isolate the affected zone to prevent distributing spores through ductwork. If the system must run, seal nearby registers, and install high-efficiency filters, changing them after work is complete.
Q: What if I’m in a multi-unit building in Bloomfield? A: Communicate with your property manager or association, because leaks or ventilation shortcomings may involve shared systems. Containment and coordination help prevent cross-unit spread, and responsibility for repairs may be defined in community rules.
Bring It Home Safely
If you proceed methodically—protecting your lungs and eyes, isolating the work zone, removing unsalvageable materials, and confirming dryness—you can resolve many small to moderate issues without drama. But whether you decide to DIY or partner with a pro, stay focused on moisture control and verification rather than quick cover-ups. If you prefer an experienced local team to assess your home, set up containment, and complete thorough mold removal, reach out to a trusted Bloomfield specialist to schedule a consultation and reclaim a clean, healthy living space.